Preparing for Simulation
Setup 1/4: Connecting to the Wi-Fi
Paul is part of a highly mobile simulation system: the patient simulator, Trainer laptop, and patient monitor are ready to use in just a few steps, easy to transport, and ideal for in-situ use.
The simulator needs to be set up with a Wi-Fi connection through a dedicated network. The Trainer laptop and Patient Monitor must connect to that same network in order to work together. This is automatically established via the provided Wi-Fi router.
Depending on which router you have, follow the corresponding set-up procedure.
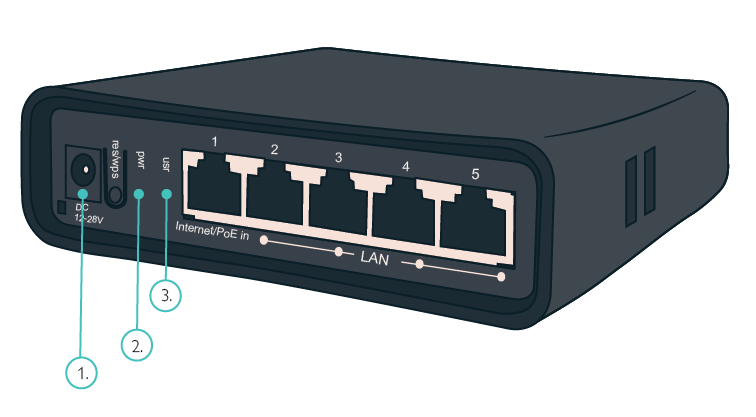
Router 1:
Plug in the power cord.
The router power LED turns green. The status LED starts blinking green as the router creates a standalone network.
 |
|
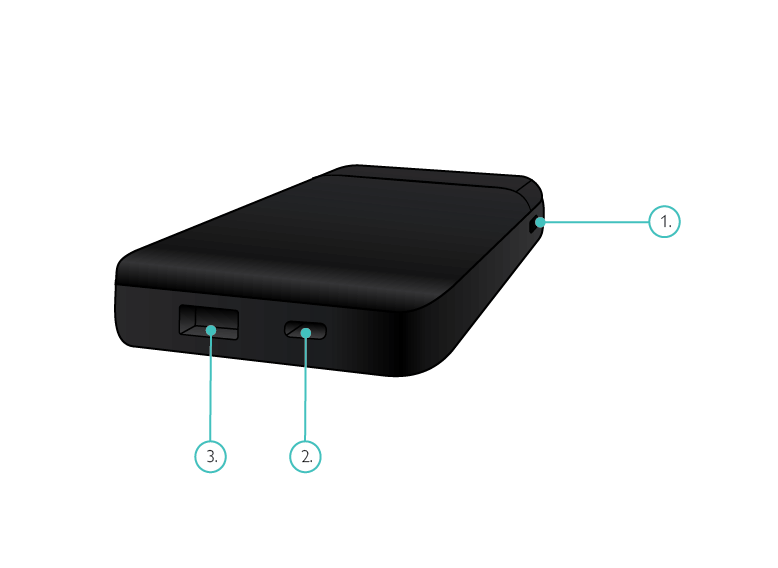
Router 2:
Plug in the power cord.
Press the Power button.
The router power LED turns green. The status LED starts blinking green as the router creates a standalone network.
 |
|
CAUTION
Do not change the Wi-Fi network name (SSID) or password on the router. Paul is configured to connect only to an SSID named “Paul Network” using a specified password. If either the SSID or password is changed, Paul will not connect.
NOTES
This process takes about 30 seconds to a minute.
The Wi-Fi network is pre-configured as "Paul Network." or "Neo Network".
Tip
For any help, contact us at: support@laerdal.com