The Graphical User Interface (GUI)
All of Paul‘s functions and the patient monitor are controlled via the GUI (Graphical User Interface).
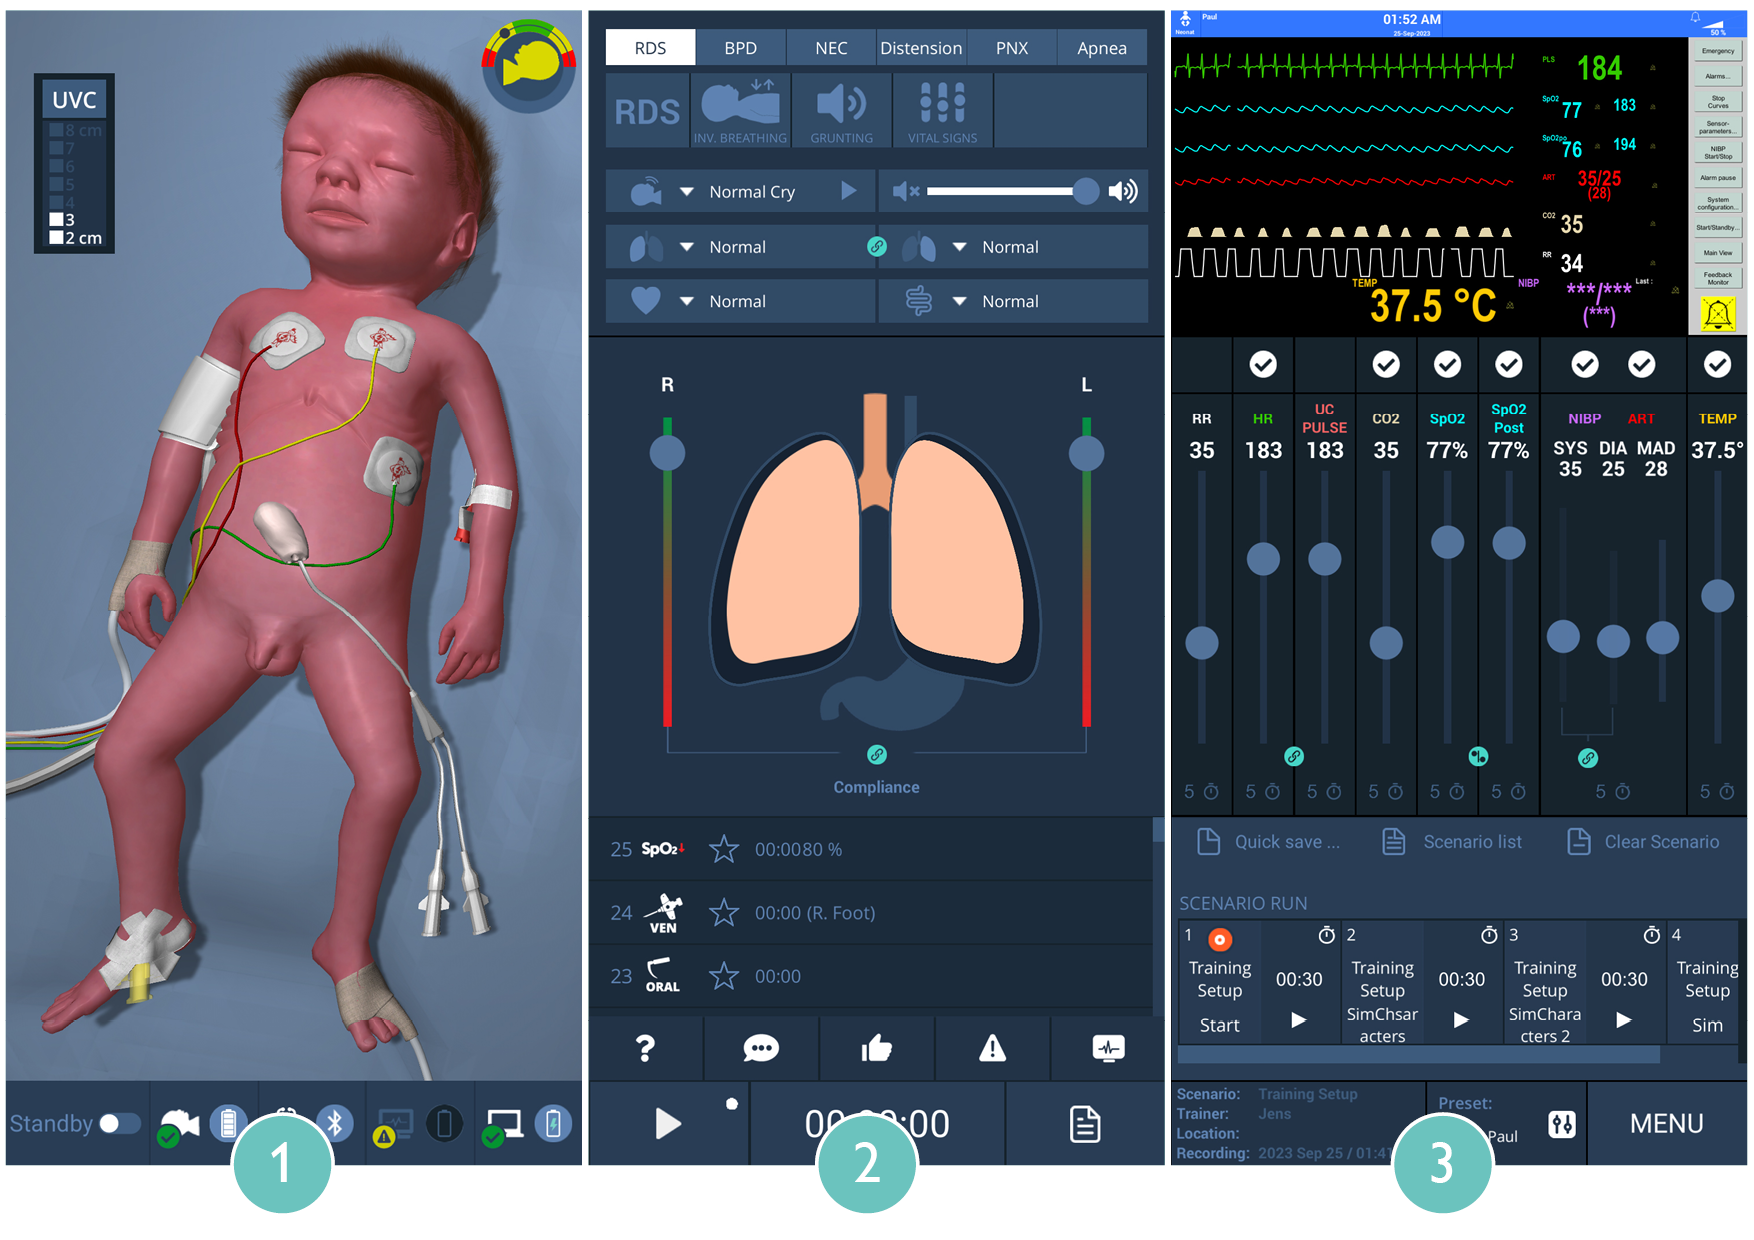
The GUI is divided into three areas:
The 3D model of Paul that depicts all functional states of the simulator in real time.
Retrieval of pre-programmed symptom complexes, control of lung function, playback of patient sounds and playback of sounds into the simulation stethoscope. Control of the debriefing system.
Control of the vital signs monitor, starting and saving scenarios, settings.
Paul control areas in the 3D simulation
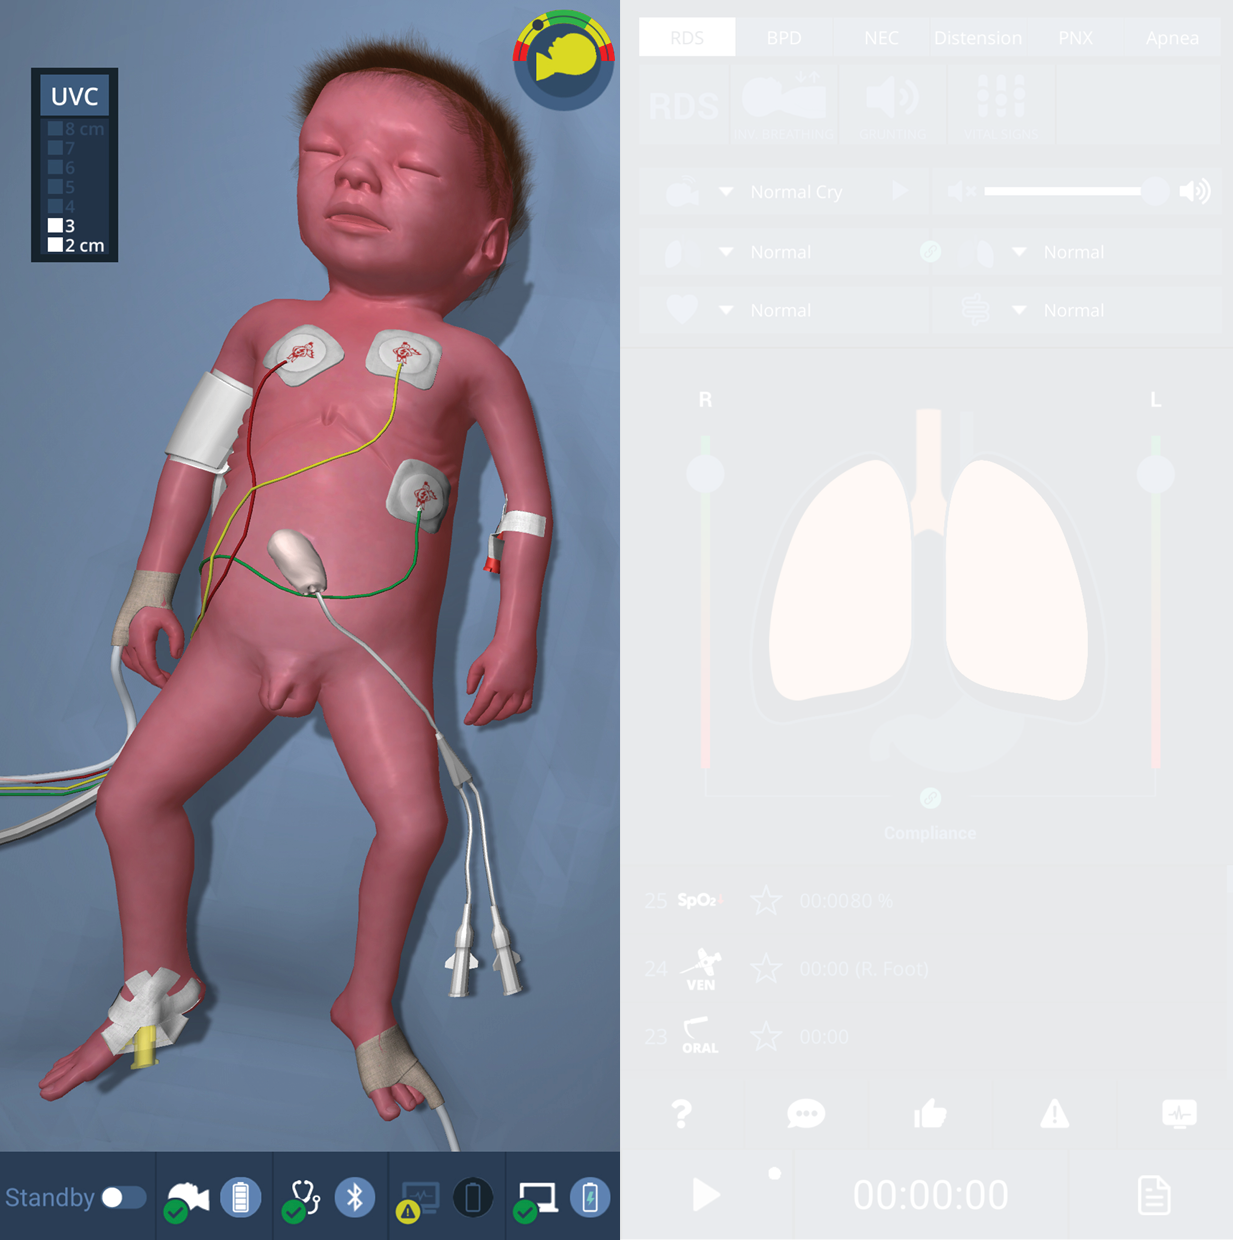
In this area, Paul is displayed in a real-time 3D simulation. Features displayed include Paul‘s breathing movements at the set breathing rate.
The sensors system recognizes actions performed on the simulator: mask ventilation, intubation or the insertion and advancement of an umbilical venous catheter. These are then displayed on the 3D animation.
At the bottom, the system status bar shows different status of the simulator, patient monitor and stethoscope:
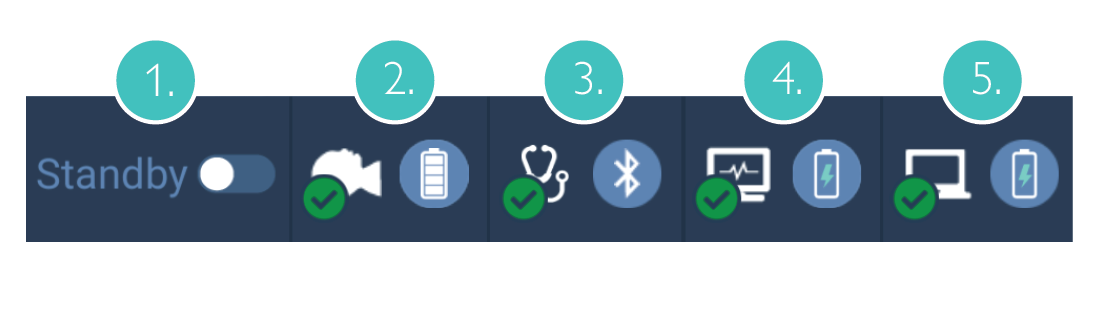 |
Standby mode: If Paul is in standby mode but connected to the control software, the light on the belly flashes green. This indicates that the simulator will be ready for use again immediately after "waking up".
Paul battery level: Move the cursor over this symbol to display the battery status as a percentage. When Paul is charging, a bolt symbol appears on the battery symbol. The battery indicator also appears when Paul is connected to the control software in standby mode and turned on its stomach.
Stethoscope connection status
Trainer laptop battery level
Patient monitor battery level
Some actions cannot be detected by the sensors, like attaching an ECG or inserting a peripheral access. These can be set by the Instructor using the input bubbles and will show on the 3D animation.
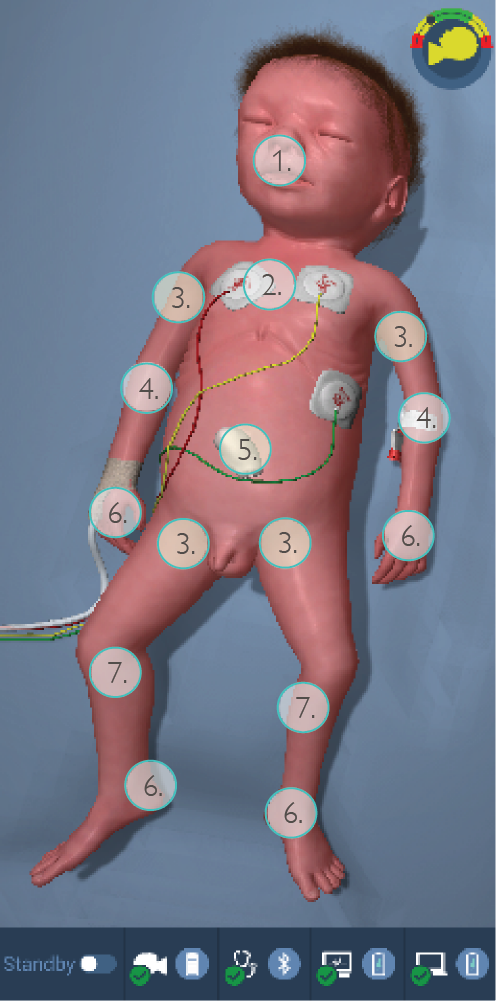 |
1 |  |  |  |
Repositioning of the oral tube | Repositioning of the nasal tube | endotracheal administration of medication |
2 |  |  |
ECG | Capillary refill time |
3 |  |
Switching pulses on and off |
4 |  |  |  | |
Blood pressure cuff | Peripheral vascular access | Arterial line | Medication |
5 |  |  | | |
Umbilical venous catheter | Umbilical arterial catheter | Medication | Switching pulses on and off |
6 | 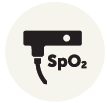 | | | |
Pulse Oximetry Sensor | Peripheral vascular access | Arterial line | Medication |
7 | |
Blood pressure cuff |
Symptom complexes, lung function, sounds and debriefing control area
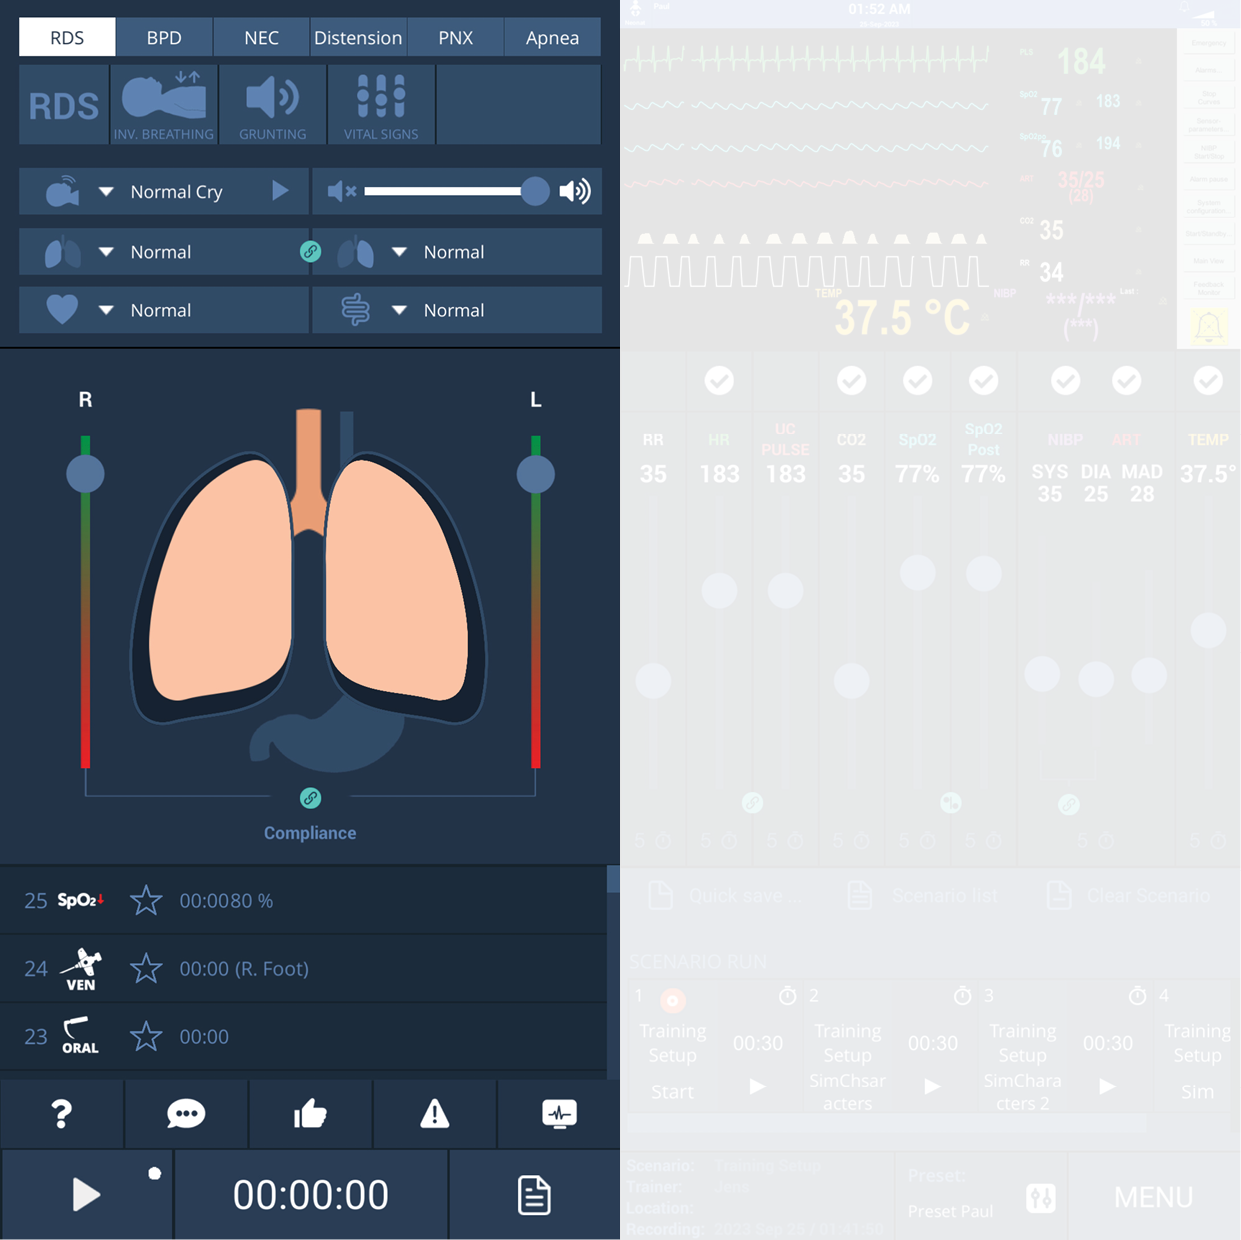
In this area of the user interface, uses can:
Select the predefined symptom complexes RDS, BPD, NEC, distension, pneumothorax and apnoea.
Change the lungs compliance.
Simulate a pneumothorax.
Set the sounds for the heart, lungs and bowel that are emitted via the stethoscope.
Select the patient sounds.
Start a training scenario and making time-stamped entries in the debriefing system.
Patient monitor area
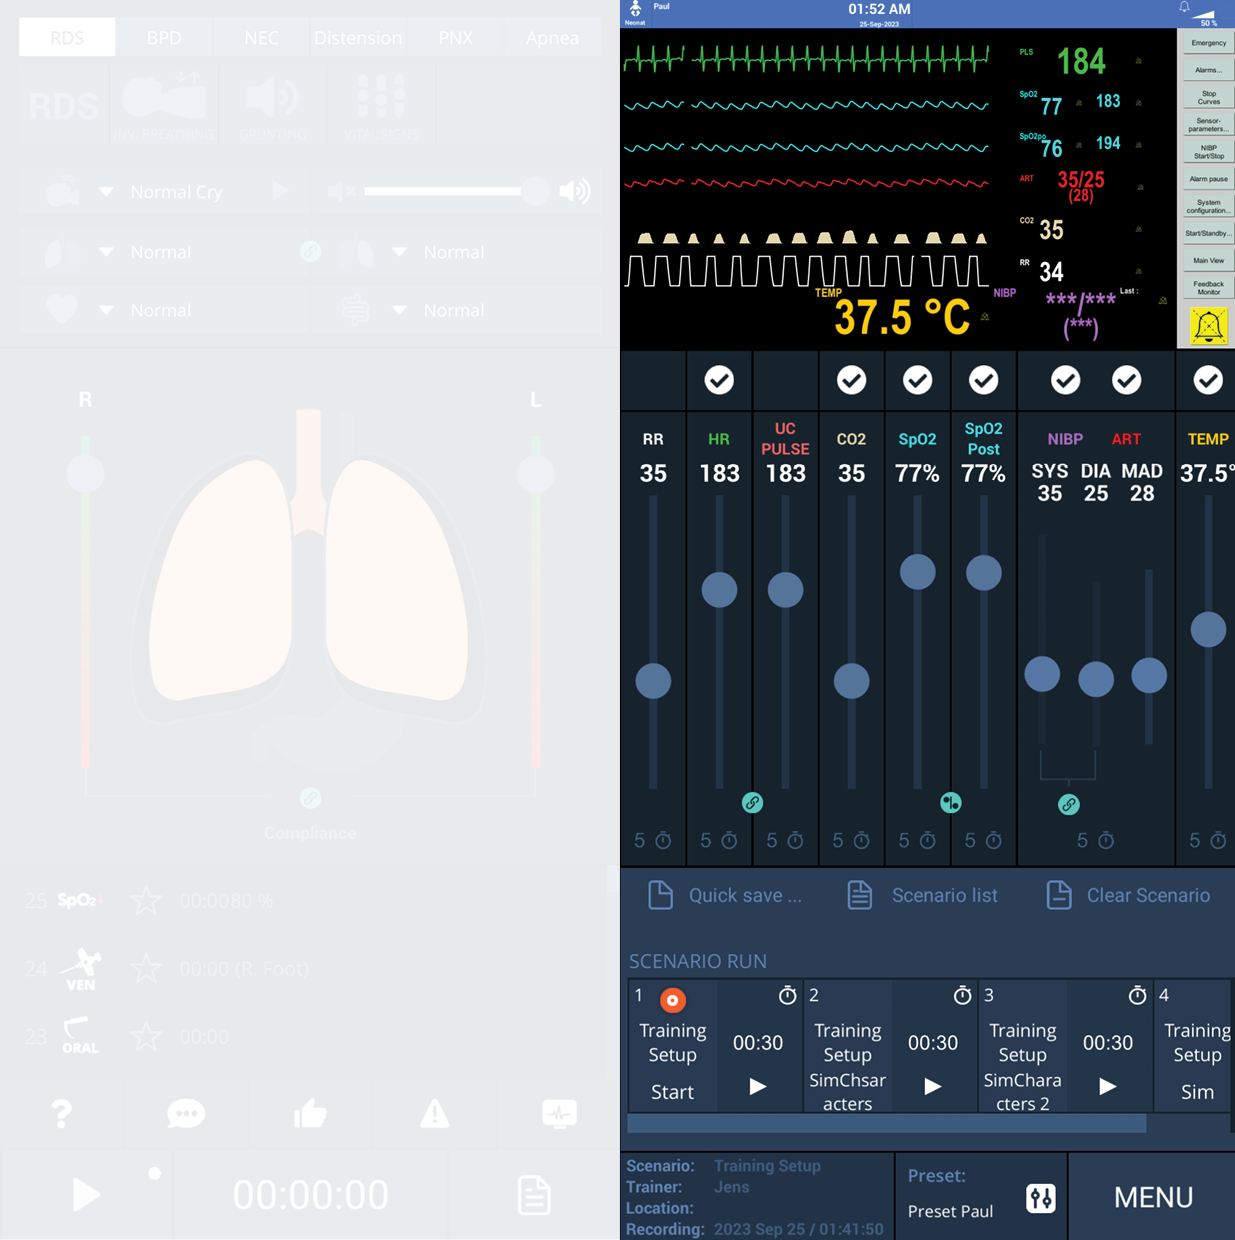
In this area of the user interface is displayed:
The simulated patient monitor as seen by the training participants in the training room is displayed.
Where the simulated patient monitor is controlled.
Where users can access the settings menu, save scenario configurations and load saved scenarios.