Scenario Design
Users can prepare scenarios in a standardized way and recall them whenever needed.
Users can build scenarios in two ways:
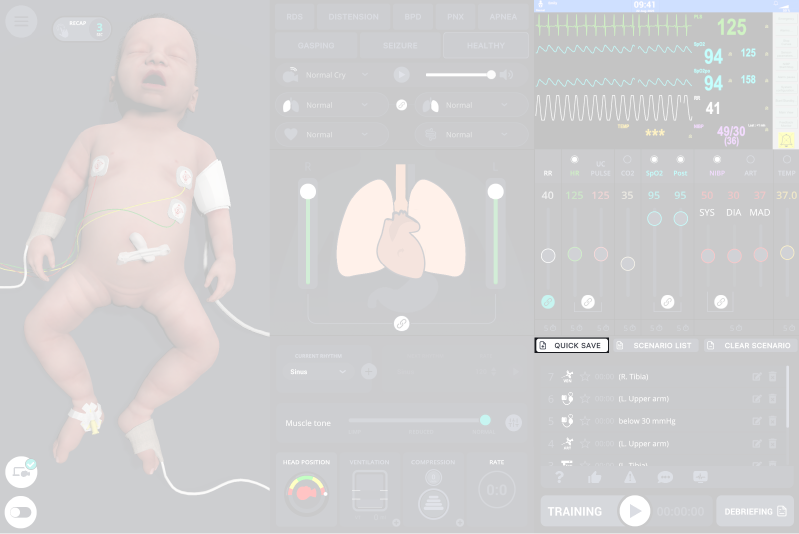
via the "Quicksave" function, users can save the current state of the entire system at any time (Emma/Emily, vital signs, monitor settings).
via the Scenario Editor, users can create and organize stages on a timeline.
Creating a scenario using Quicksave
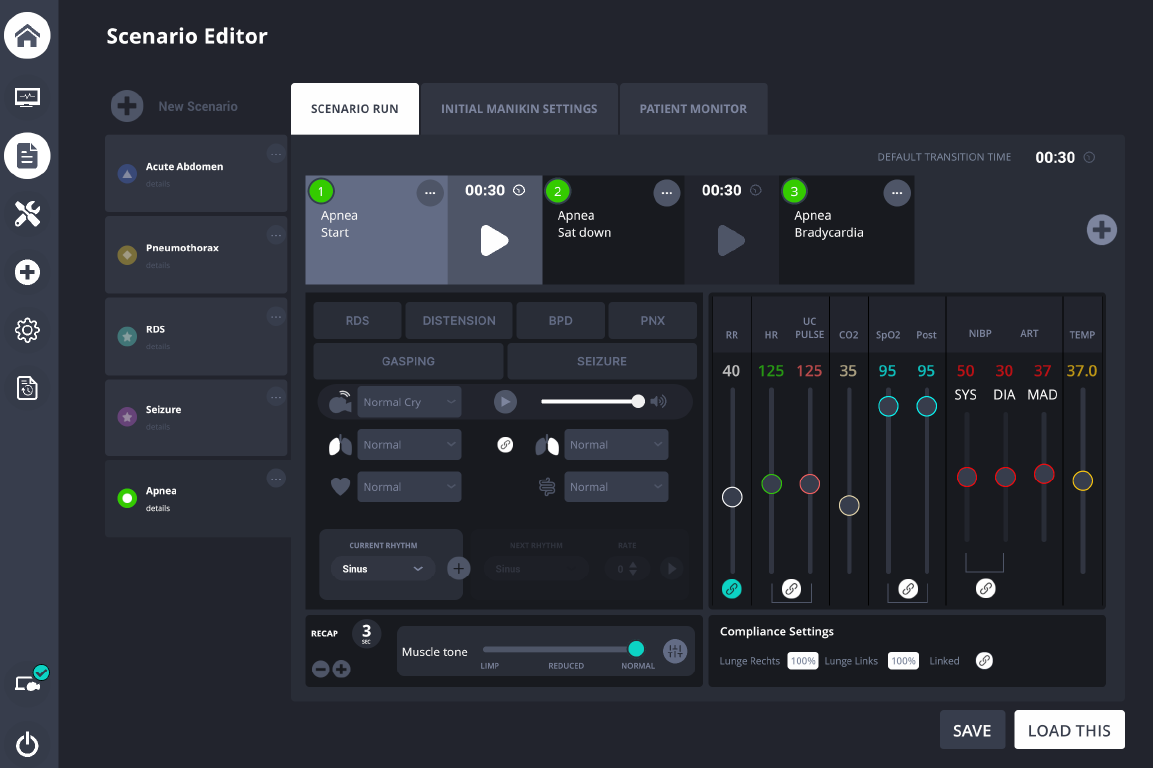
By stringing together several scenario stages and connecting them via a freely definable transition time from one stage to the next, entire scenario sequences can be programmed.
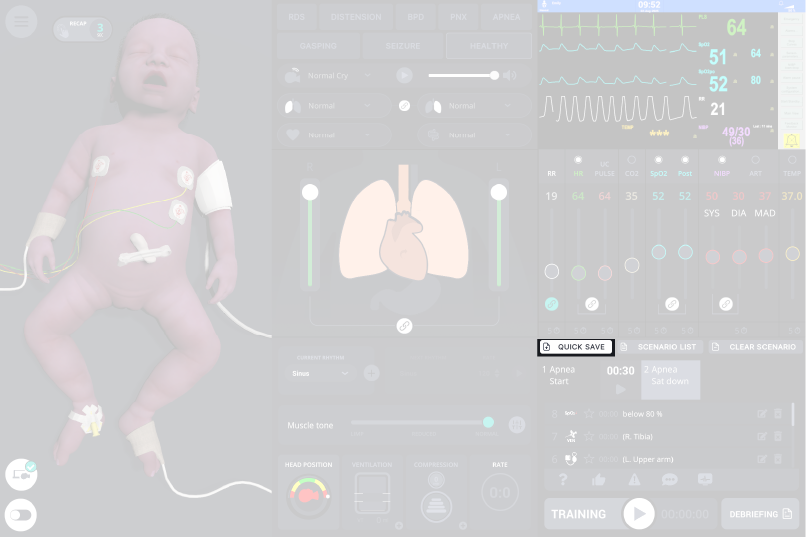
Set the initial simulator state (Emma/Emily, vital signs, monitor settings), then click Quicksave.
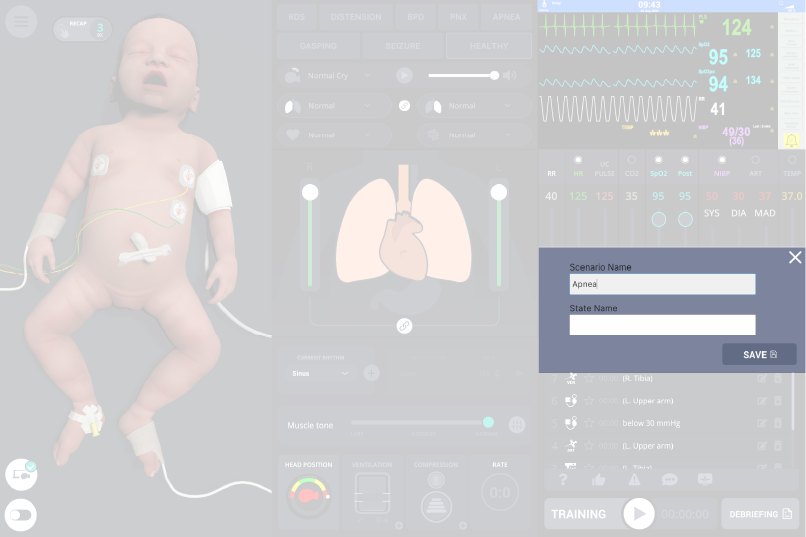
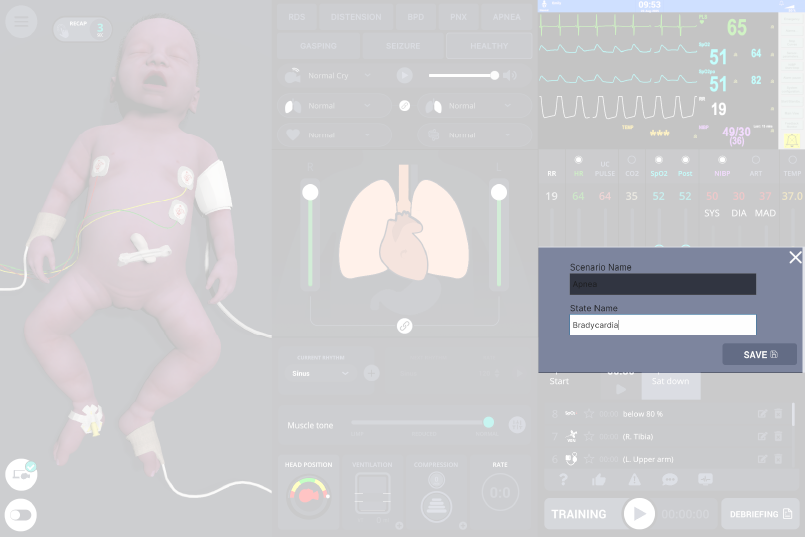
Enter a scenario title, then click Save.
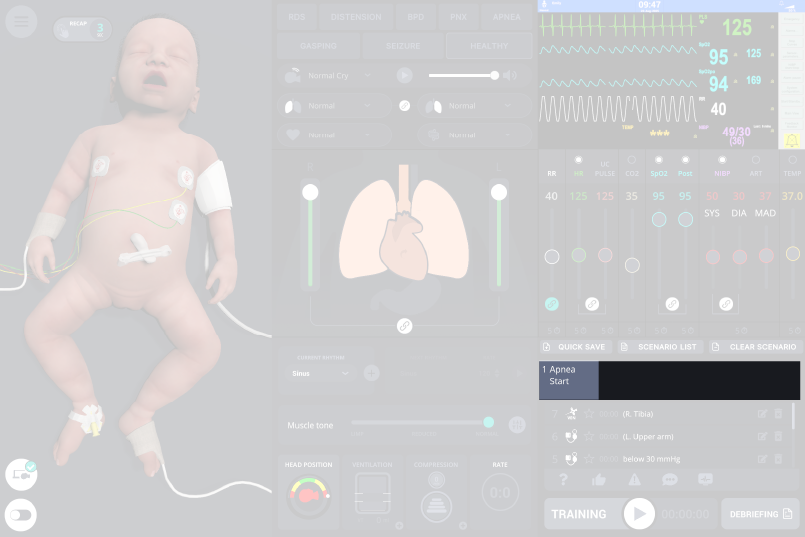
The first stage is saved and appears in the Scenario history.
Set the next simulator state and click Quicksave again. In the window, enter a Status name.
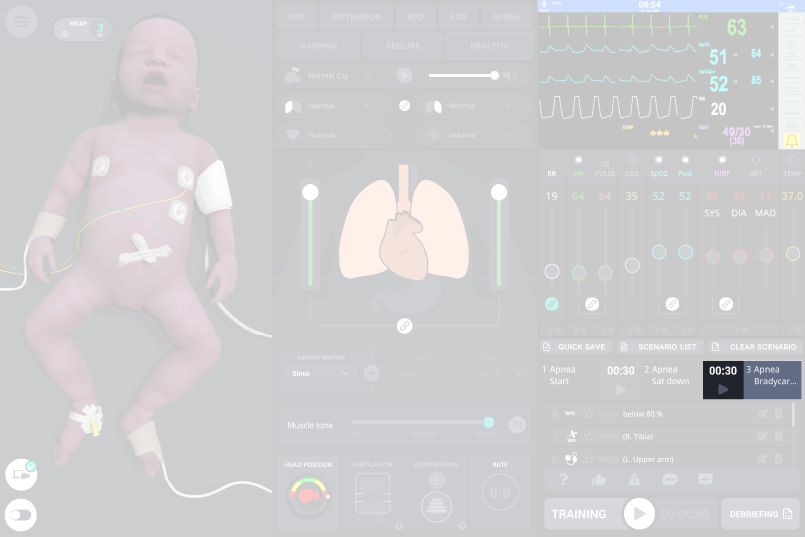
The second stage is saved. A transition-time field now appears between the two stages.
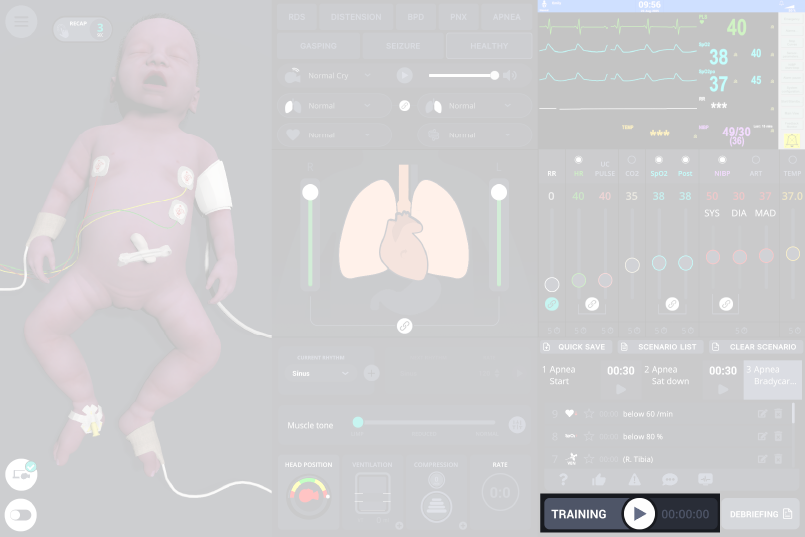
Set the next state and click Quicksave again.
Enter a Status name for the new stage.
Choose the transition time between the stages.
Repeat as needed, then start the pre-programmed scenario with Play.
Creating a scenario using Scenario editor
In the scenario editor you will find all your programmed scenarios and can also edit them there. You can also mark your own scenarios here with their own symbol and colour to make them easier to find.
Scenarios can also be programmed in the Scenario Editor.
On the Trainer laptop, open the system side bar on the left side of the screen.
Select the Scenario icon.
NOTES
The editor lists all existing scenarios and allows editing. Scenarios can be tagged with a custom icon and color for quick identification.
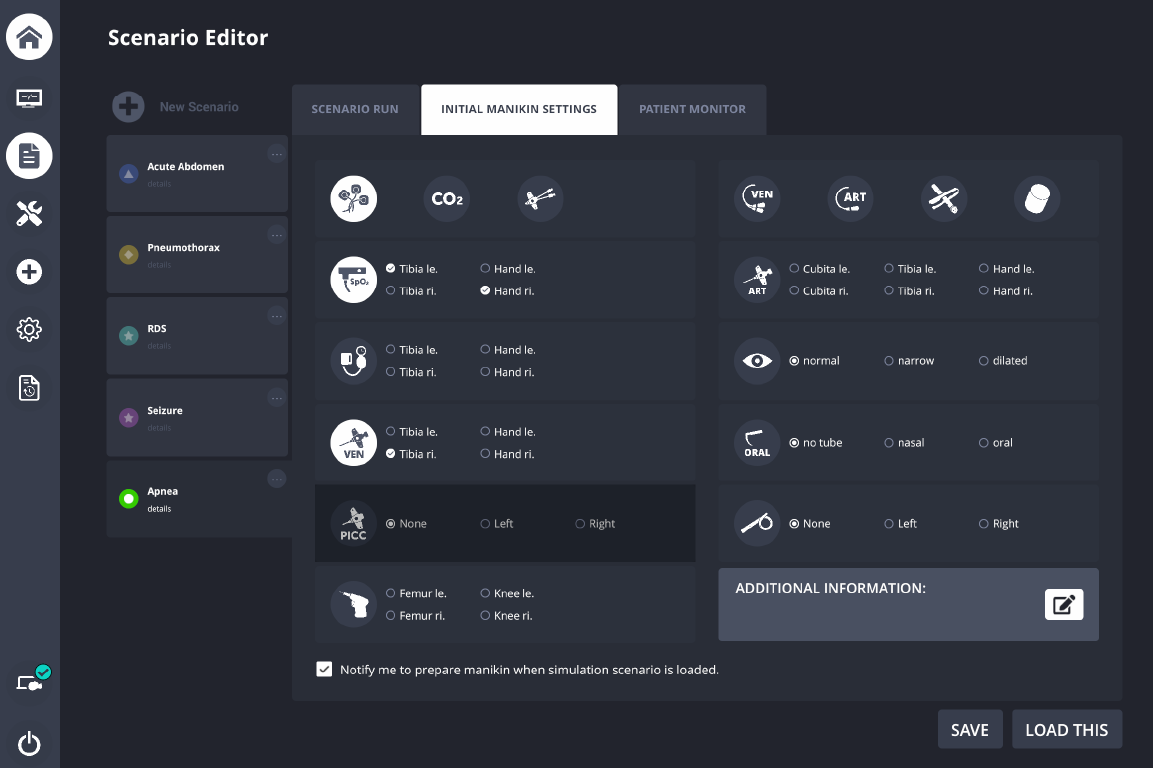
Initial Manikin Settings
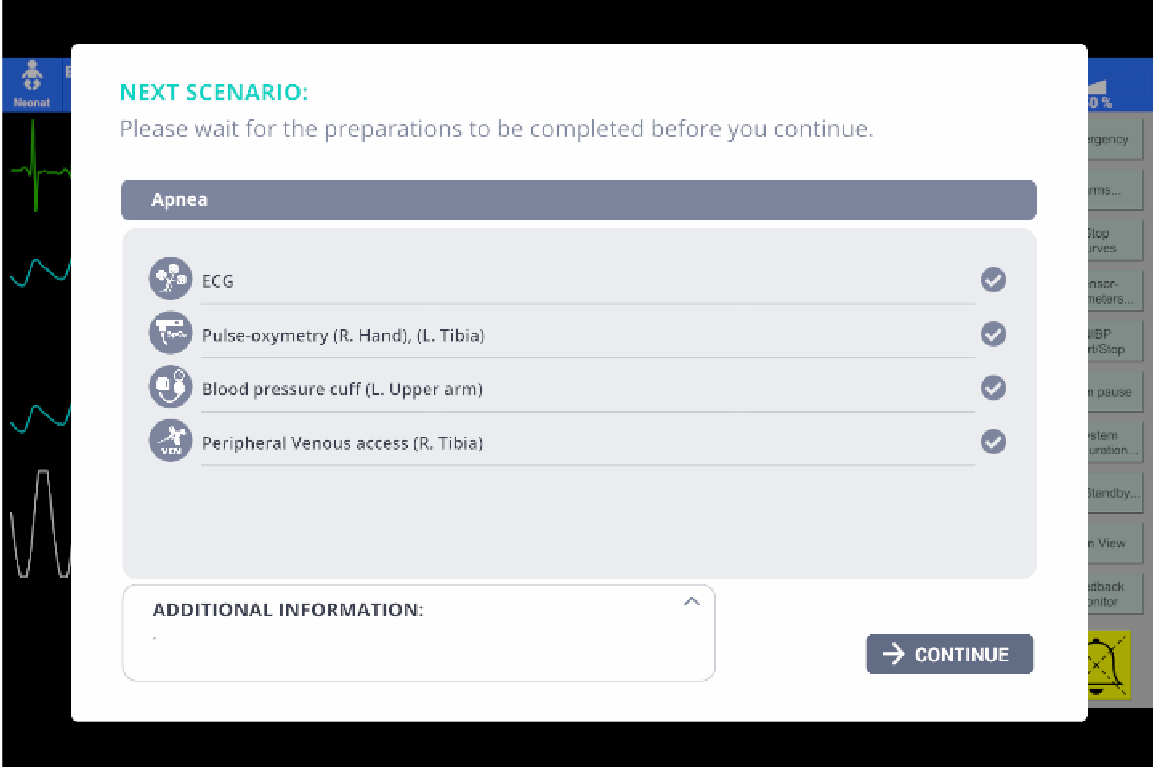
Under the Initial Manikin Settings tab, users can define the simulator’s starting conditions. Once they have programmed a scenario or set the default parameters for the scenario start, icons such as ECG or SpO2 will be automatically activated. Users can then select additional icons as needed, for example, peripheral IV access or an endotracheal tube.
In addition, the “Additional Information” field allows users to enter free-text notes. All of these details will appear as a checklist on the patient monitor in the training room.
Starting saved scenarios
Select the Scenario editor tab.
Select the desired scenario from the list.
Click Load Scenarios.
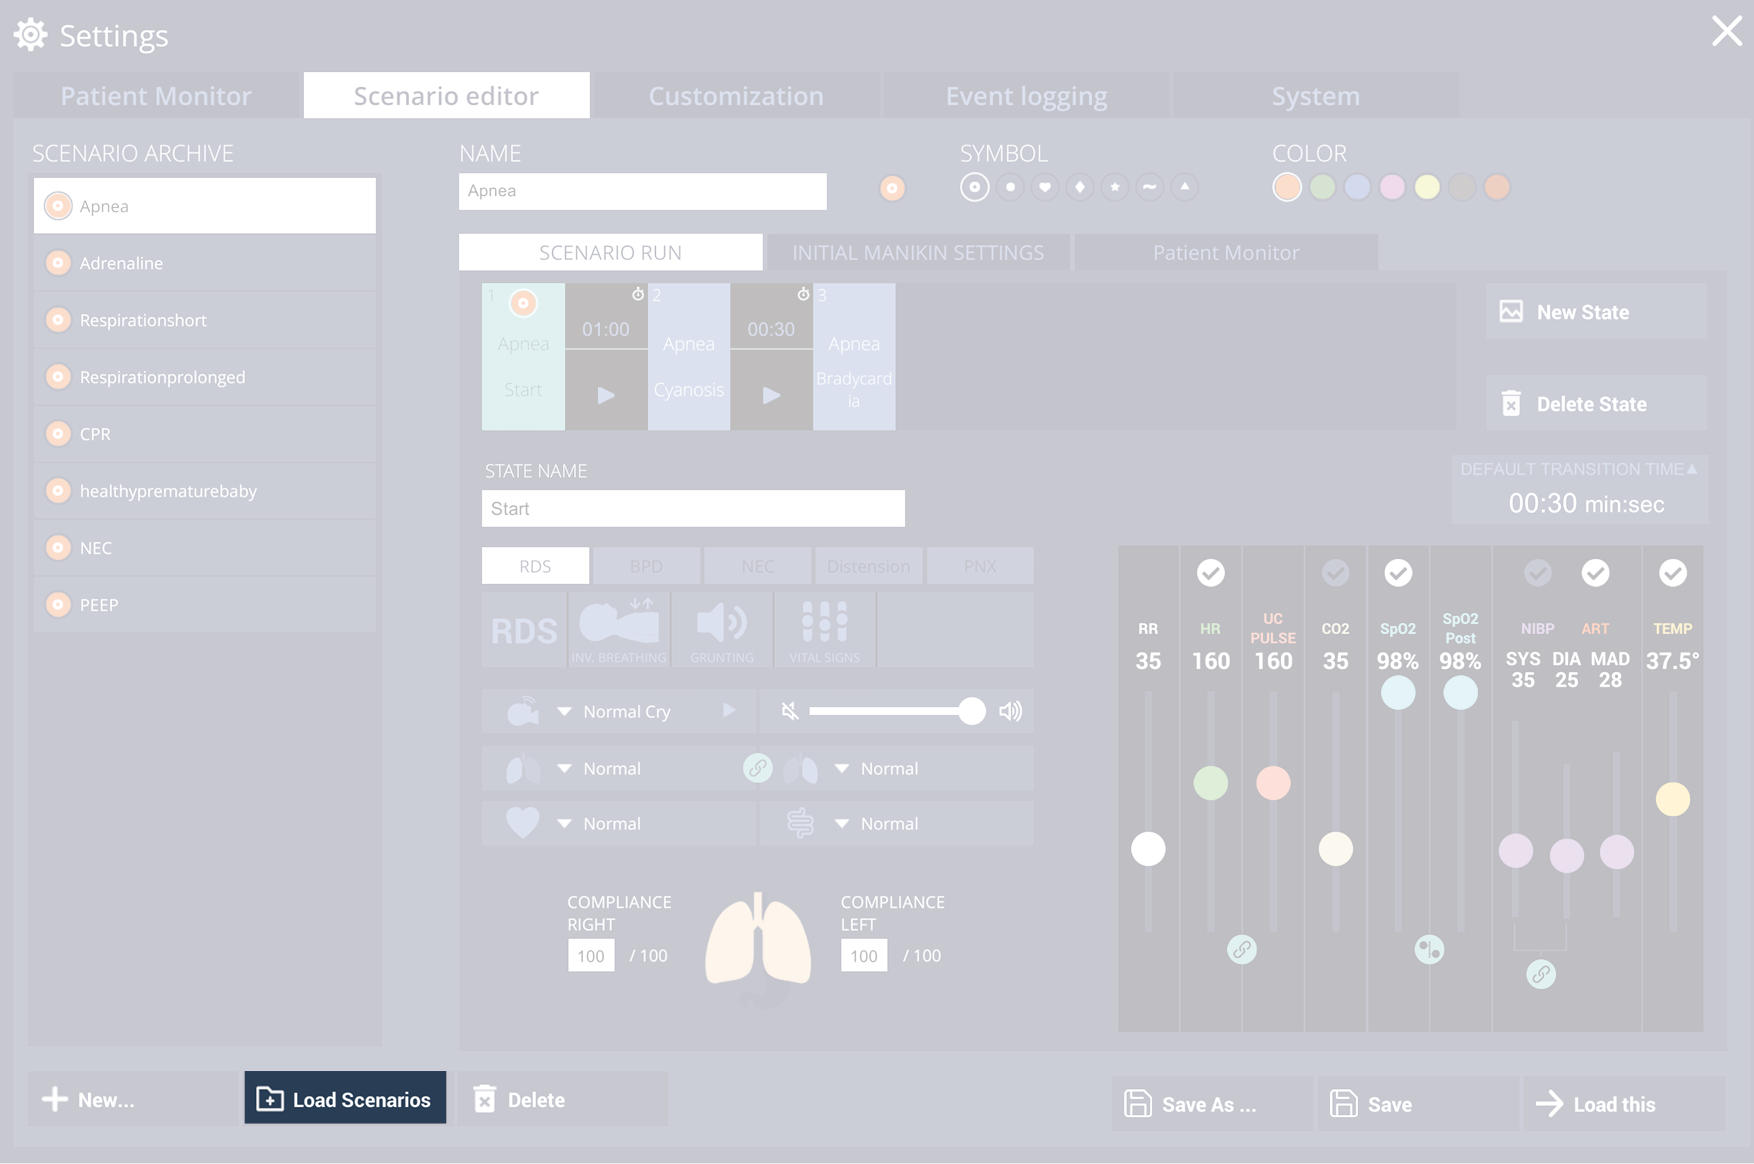
The stages appear in the Scenario run area.
Click Play to start playback.
The scenario advances through stages according to the configured transition times.
Use Pause/Resume to halt or continue the run.
Use Next/Previous stage to skip or jump between stages.
When finished, click Stop.
NOTE
During a programmed scenario, users can intervene in the scenario process at any time; the scenario is then not continued. During the scenario, the progression can also be paused or accelerated or stages can be skipped.
Scenario checklist
When a pre-programmed scenario is loaded, a preparation checklist is displayed on the patient monitor in the training room. This helps the SIMTech or SIMNurse to prepare the scenario in a standardized way. On the control laptop in the instructor area, it is visible if the preparations in the training room have not yet been completed. Once the preparations are confirmed as completed in the training room, the scenario start is also enabled on the control laptop.