Breathing
Emma/Emily has highly realistic upper airways and a physiological lung. This enables the simulation of respiratory pathologies specific to newborn babies and the training of all necessary measures under highly realistic conditions.
Normal spontaneous breathing
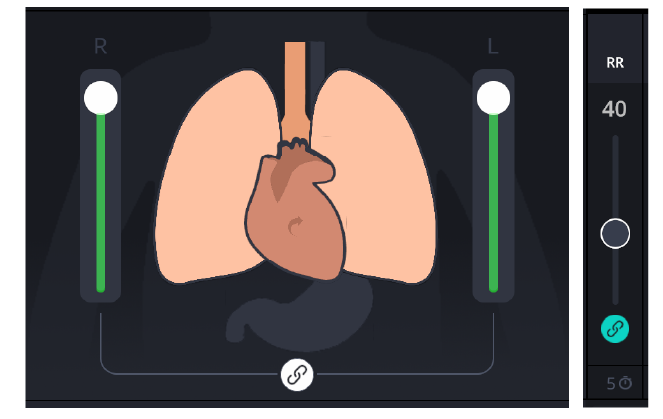
Once Emma/Emily is powered on and the control software has fully loaded, she begins breathing regularly at a physiological respiratory rate of approximately 40 breaths per minute.
The respiratory rate (RR) can be adjusted using the RR controller located in the monitor area, directly to the right of the animated lungs.
NOTE
The rate can be set anywhere between 0 breaths per minute (apnea) and 100 breaths per minute (tachypnea).
The small clock below the respiratory rate slider bar automatically changes the respiratory rate over any defined period of time. The default setting is 5 seconds.
The manikin always breathes at the respiratory rate currently defined and the same respiratory rate is displayed in the 3D animation and the animated lung. When respiration is normal, the chest of the manikin rises and falls and the abdomen also moves slightly, synchronized with every breath.
Lung compliance
Emma/Emily's physiological lung makes it possible to change lung compliance during a training session using the slider bar directly next to the lung on the GUI.

When the compliance is reduced, the lung volume is also reduced, as a result of which the animated lung becomes smaller and indicates reduced compliance. The manikin is then more difficult to ventilate.
NOTE
For general compliance changes, both lungs must be connected using the “Connect” button, so that the compliance of both lungs changes to the same extent at the same time.
Cyanosis and hyperoxia
The simulator is equipped with multiple LED lights in the head area to visually simulate changes in oxygen saturation.
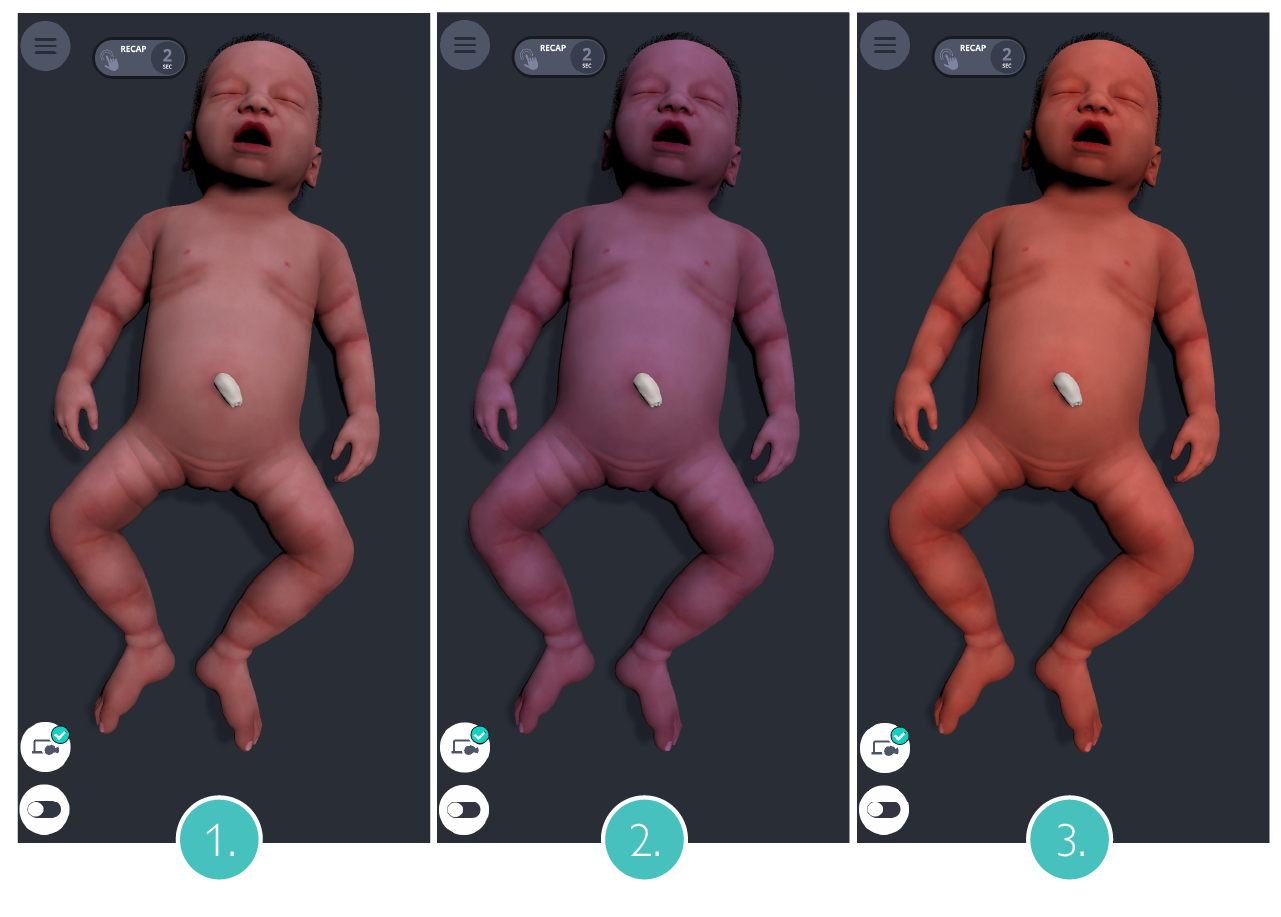
Normal saturation: between 97 % and 90 %, the LEDs are in standby mode, with no visible discoloration.
Cyanosis: peripheral saturation below 88 %, a blue discolouration appears in the area of the head, which increases in intensity as the saturation continues to decrease.
Hyperoxia: peripheral saturation above 99%, a red coloration increases in intensity in these areas.
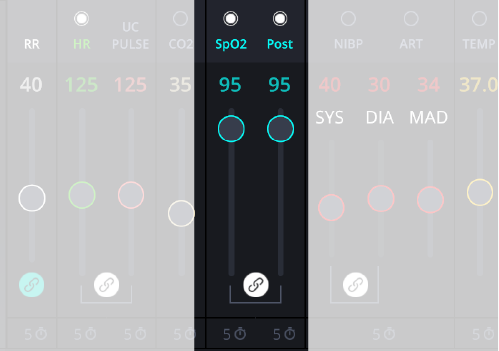
The peripheral saturation (SpO2) can be changed by dragging the slider.
NOTE
The discoloration can be seen both on the simulator and in the 3D animation of Emma/Emily on the GUI.
Pneumothorax
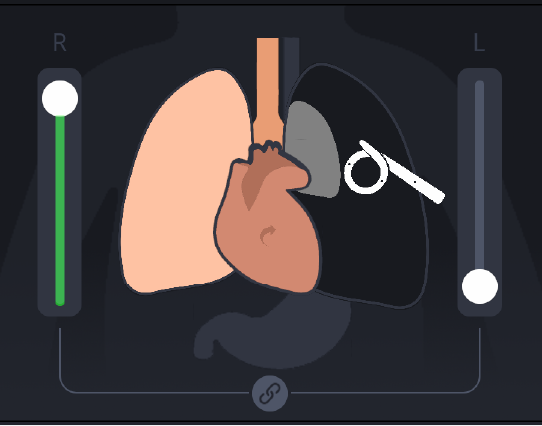
Emma/Emily allows simulation of a pneumothorax on the right or left (or both) sides.

As a pneumothorax usually occurs unilaterally, it is recommended to cut the link between the two lungs using the "Connect" button to simulate a pneumothorax.
In case of a unilateral pneumothorax, the ventilated side of the chest predominantly rises. On the side of the pneumothorax, only very slight chest elevation or no more chest elevation can be observed. On this side, only weakened or no breath sounds can be auscultated.
Diaphanoscopy
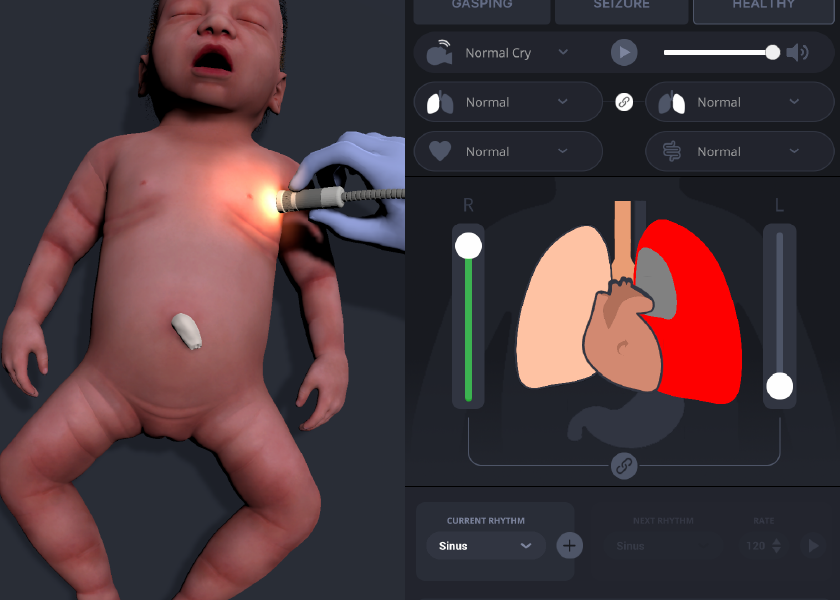
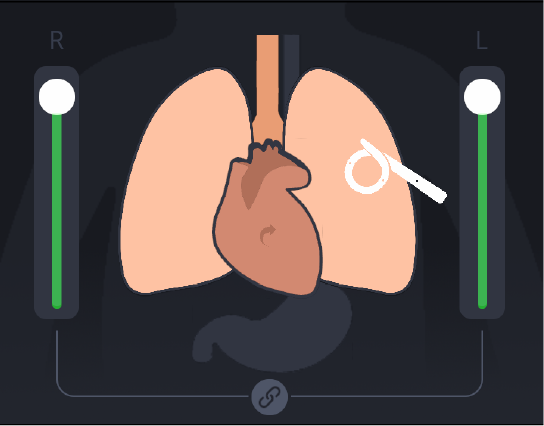
When a pneumothorax is activated via the control software, it can be diagnosed using a strong lamp to simulate a diaphanoscopy.
When a suitable light source is placed on the affected side of the chest, the surrounding area on the simulator lights up brightly, mimicking a positive diaphanoscopy. On the unaffected side, no illumination is visible.
On the user interface, the lamp is shown graphically, and the lung affected by the pneumothorax is marked with a red coloration.
Chest drain insertion
Preformed access points are located on both the right and left sides of the chest, corresponding to the 4th intercostal space along the anterior to mid-axillary line. A Fuhrman pleural drainage set, such as a 6.0 Fr pigtail catheter (e.g., from Cook Medical) is recommended for use.
CAUTIONS
Do not use the introducer needle, as it may damage the simulator’s skin, internal electronics, or mechanics. Instead, begin the procedure by inserting the guide wire directly into one of the preformed holes.
Do not puncture the simulator with sharp instruments or needles.
Do not suture the catheter to the simulator.
All further steps can then be performed as usual.
Once the catheter is inserted, click the catheter icon on the user interface. The catheter will then appear in the 3D animation of Emma/Emily and be shown in the animated lung.
If a scenario is running, the catheter placement will also be time-stamped and logged in the debriefing system.
Needle decompression
Needle decompression can also be performed in the 2nd intercostal space at the midclavicular line. Preformed holes are provided at these locations on both sides of the thorax.
CAUTION
Do not insert a needle into the thorax, as it may damage the simulator. Instead, use only the plastic tubing of a peripheral IV access device or similar equipment.
Do not puncture the simulator with sharp instruments or needles.