Cleaning
Cleaning preparation
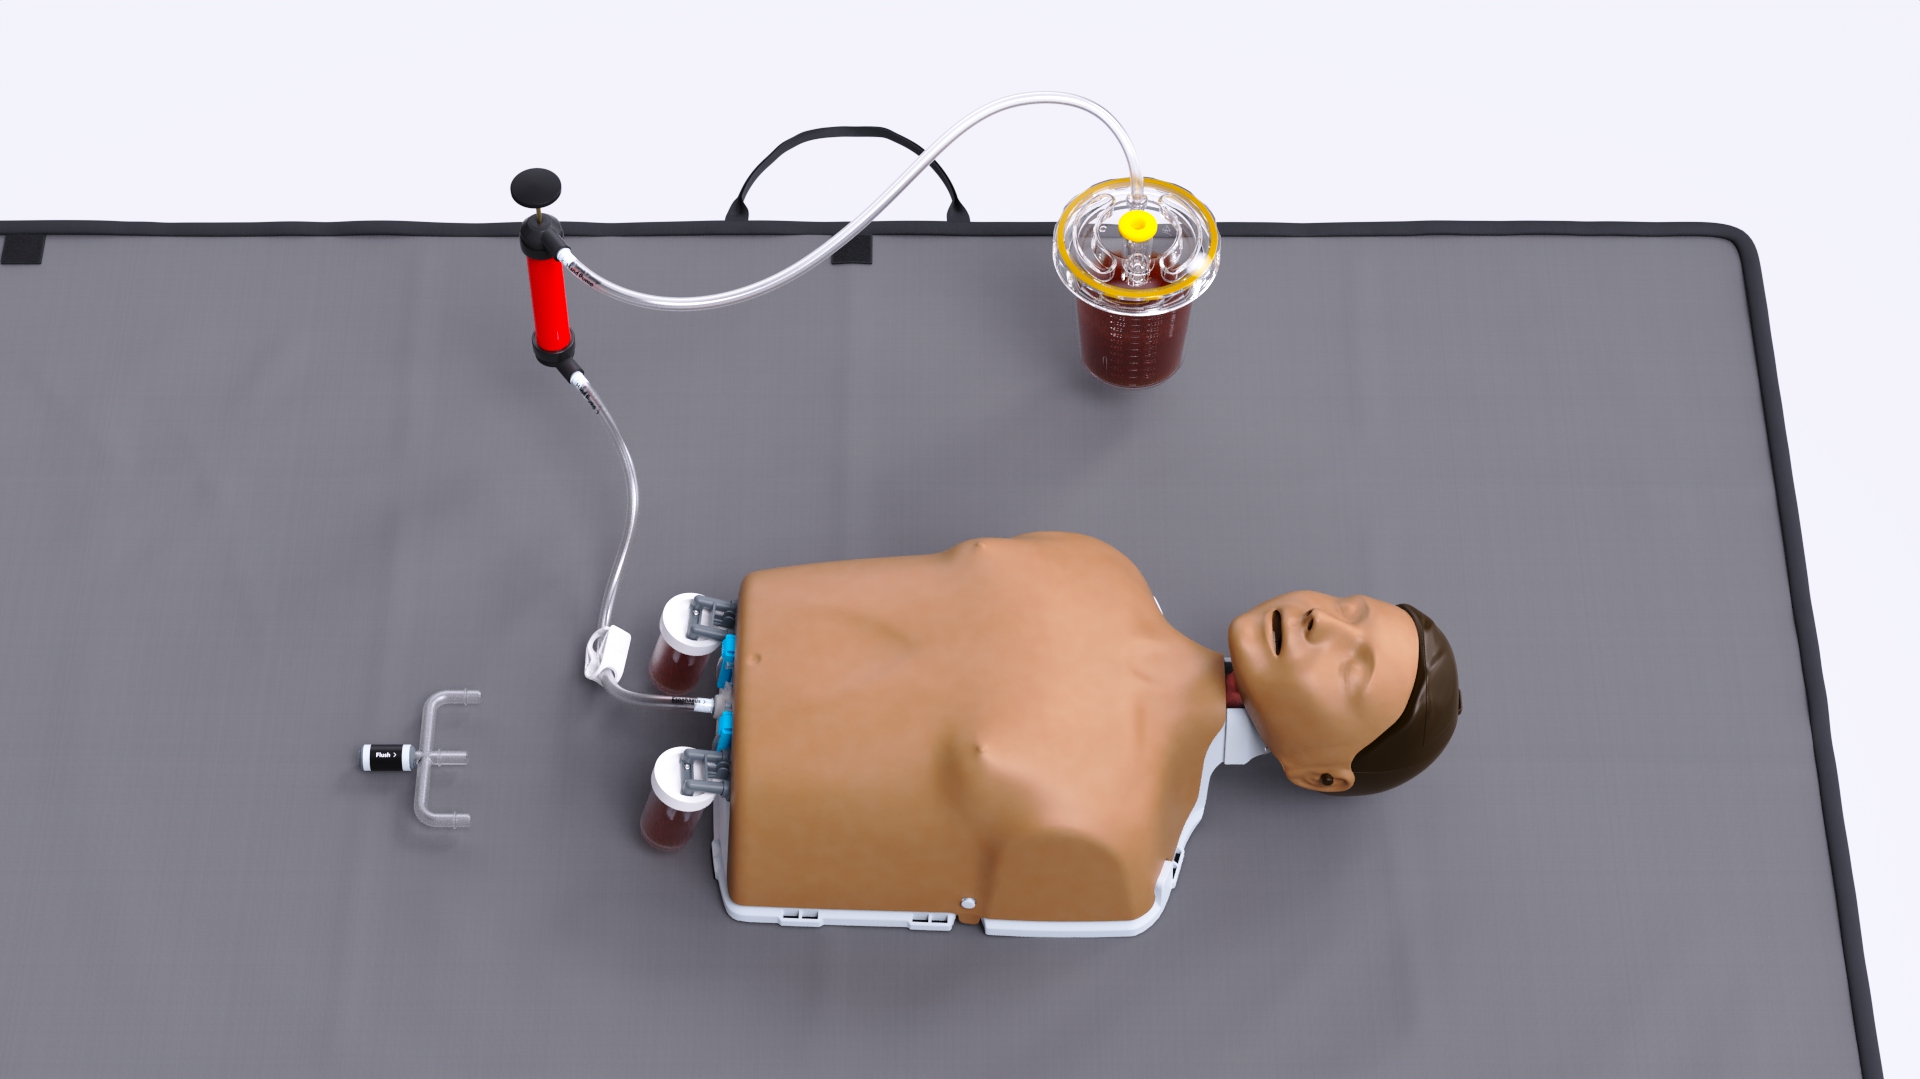
Fold the mat over the components and carry everything to the sink.
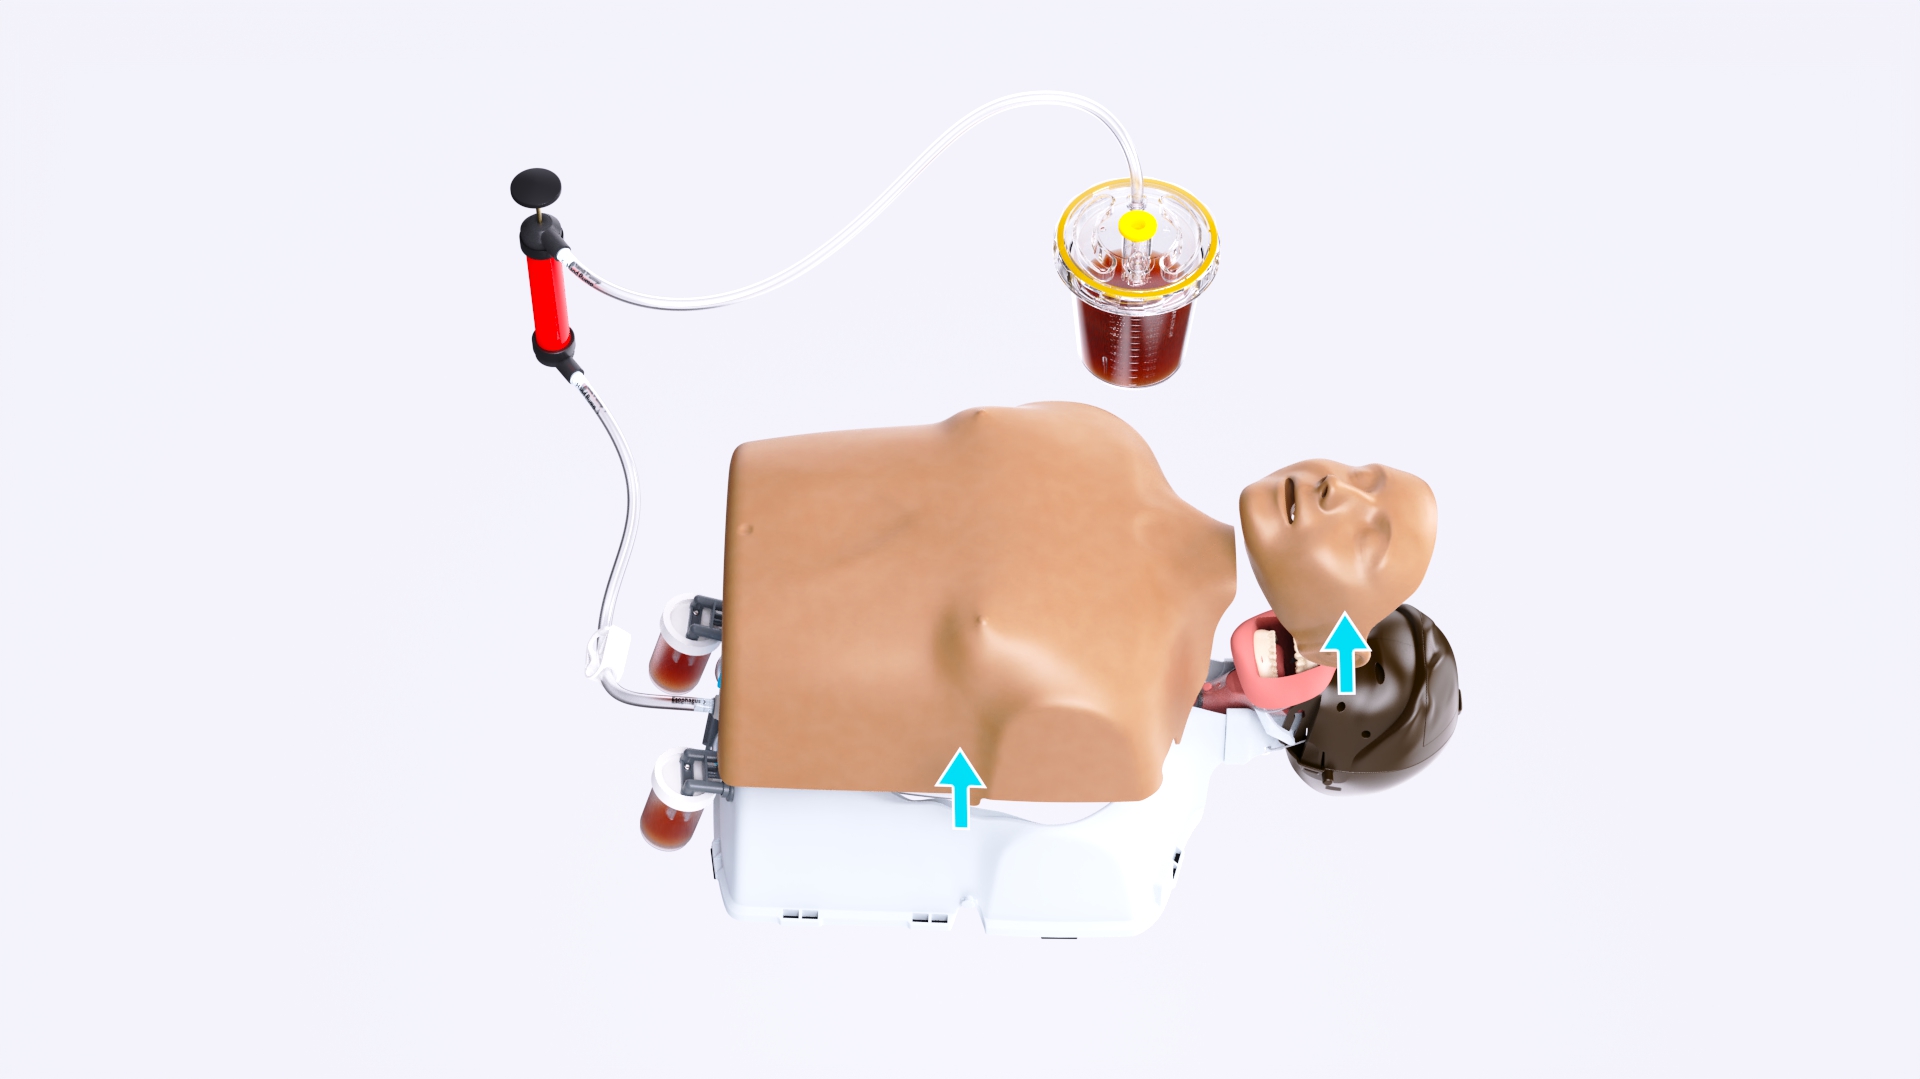
Remove the face and chest skin from the manikin.
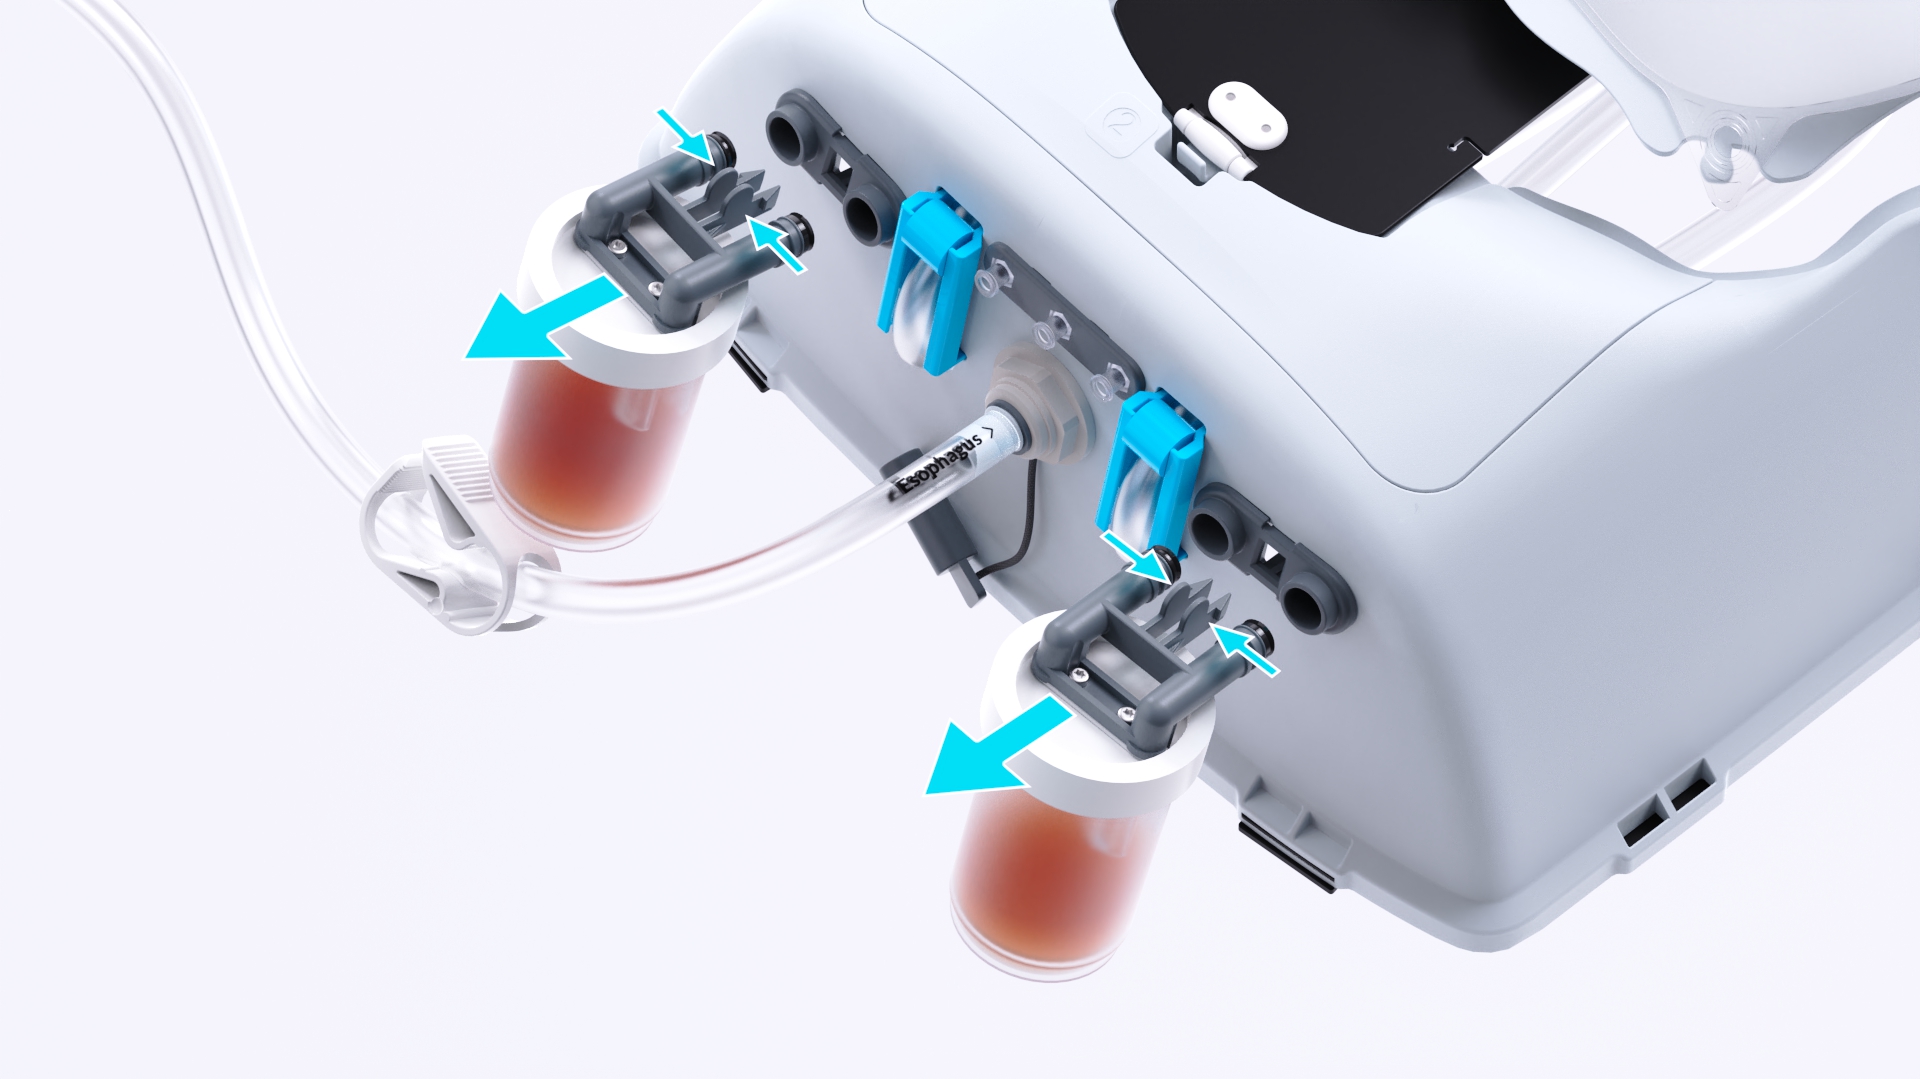
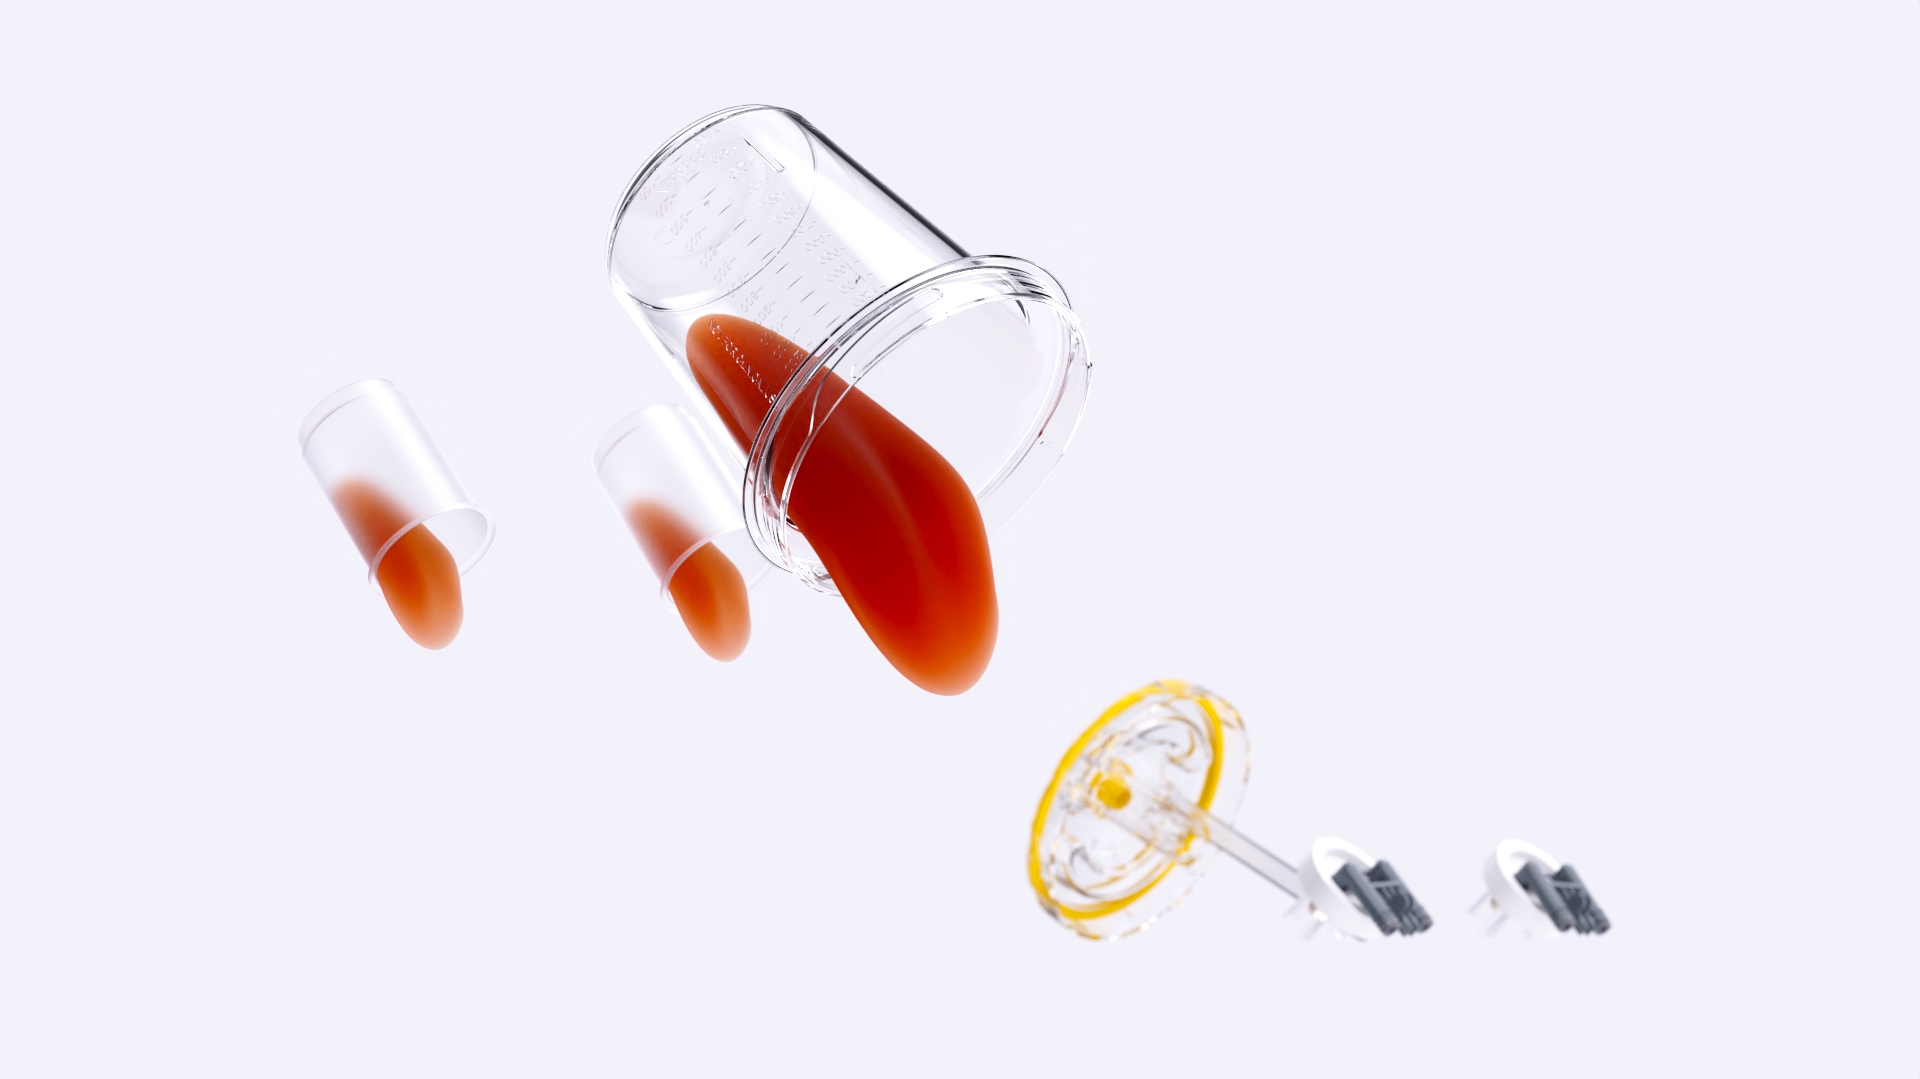
Disconnect the aspiration containers from the manikin.
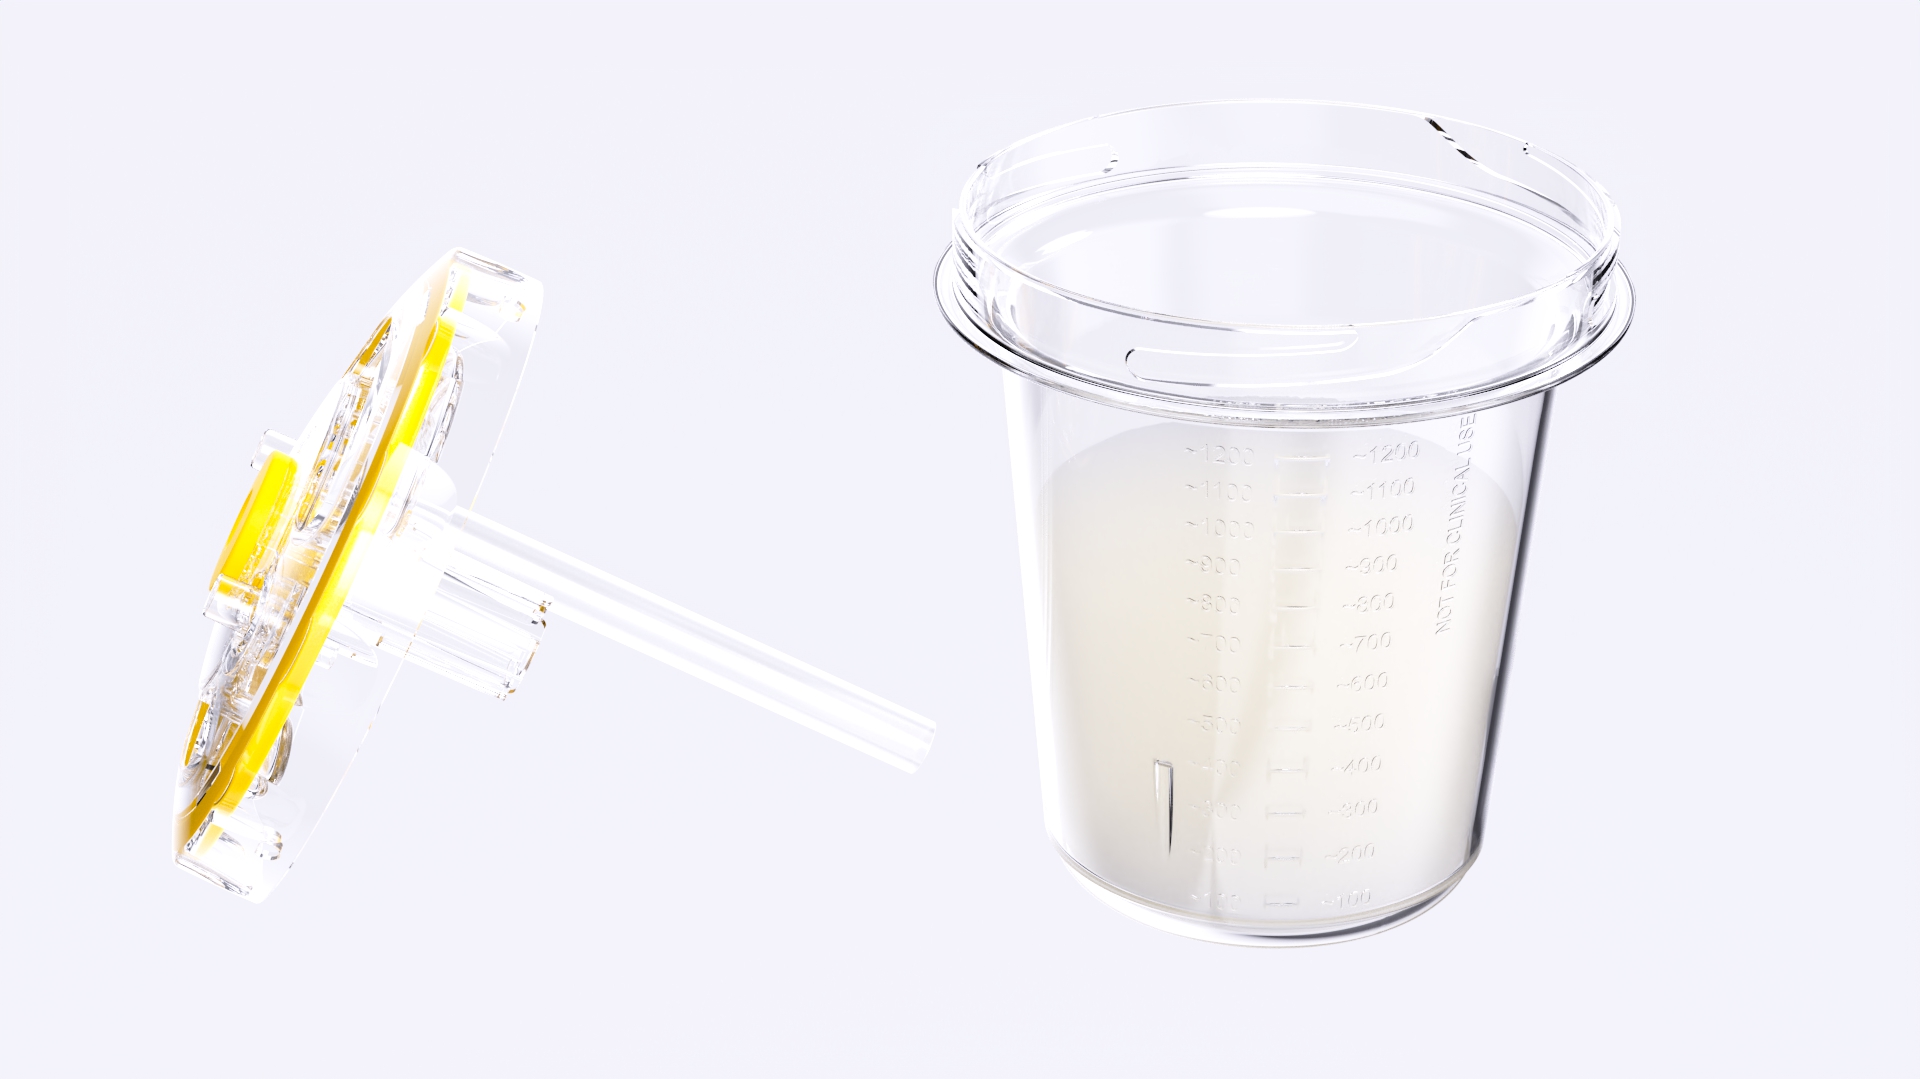
Empty the LSU for LAAS canister and aspiration containers into the sink.
Clean and rinse the LSU for LAAS canister and fill with lukewarm soapy water.
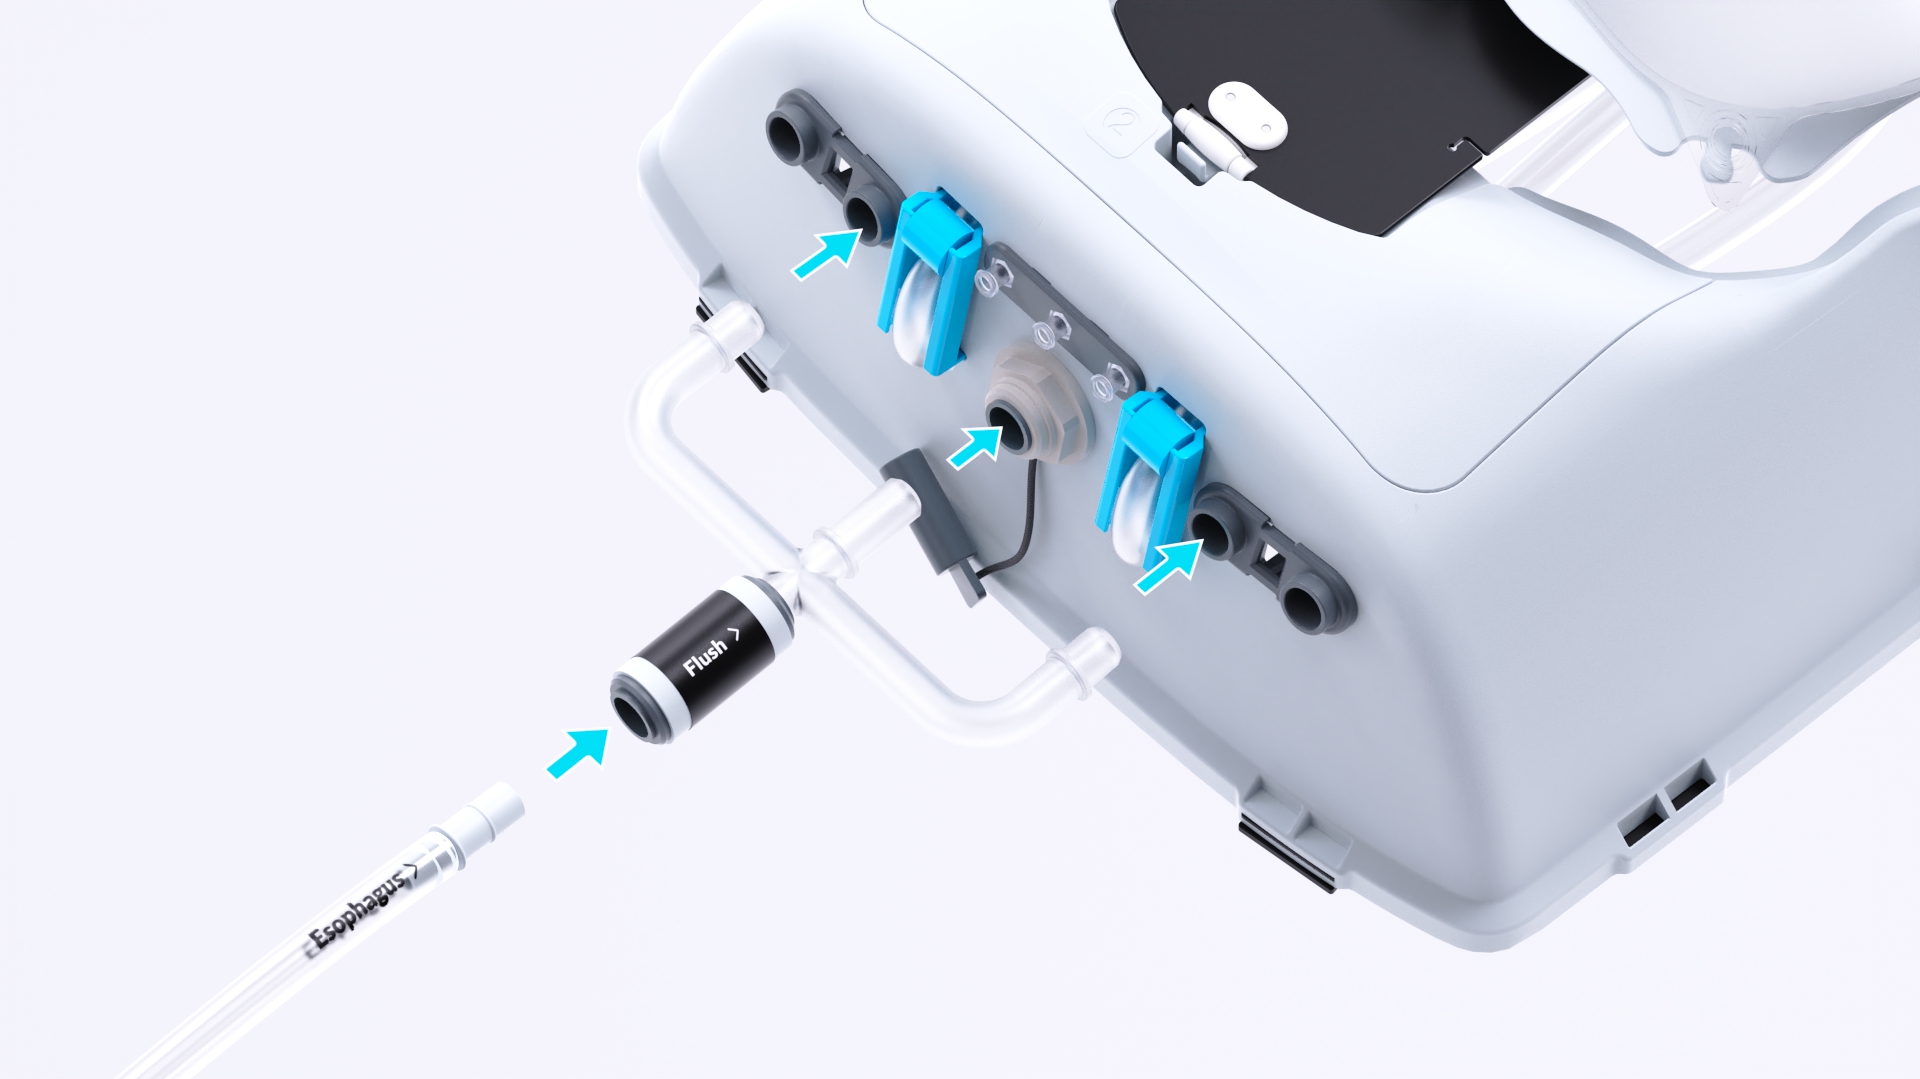
Connect the cleaning adapter to the manikin.
Cleaning
CAUTION
Do not allow water or cleaning fluids to enter the manikin chest plate or LSU for LAAS during cleaning, as this can damage internal components and render the devices inoperable.
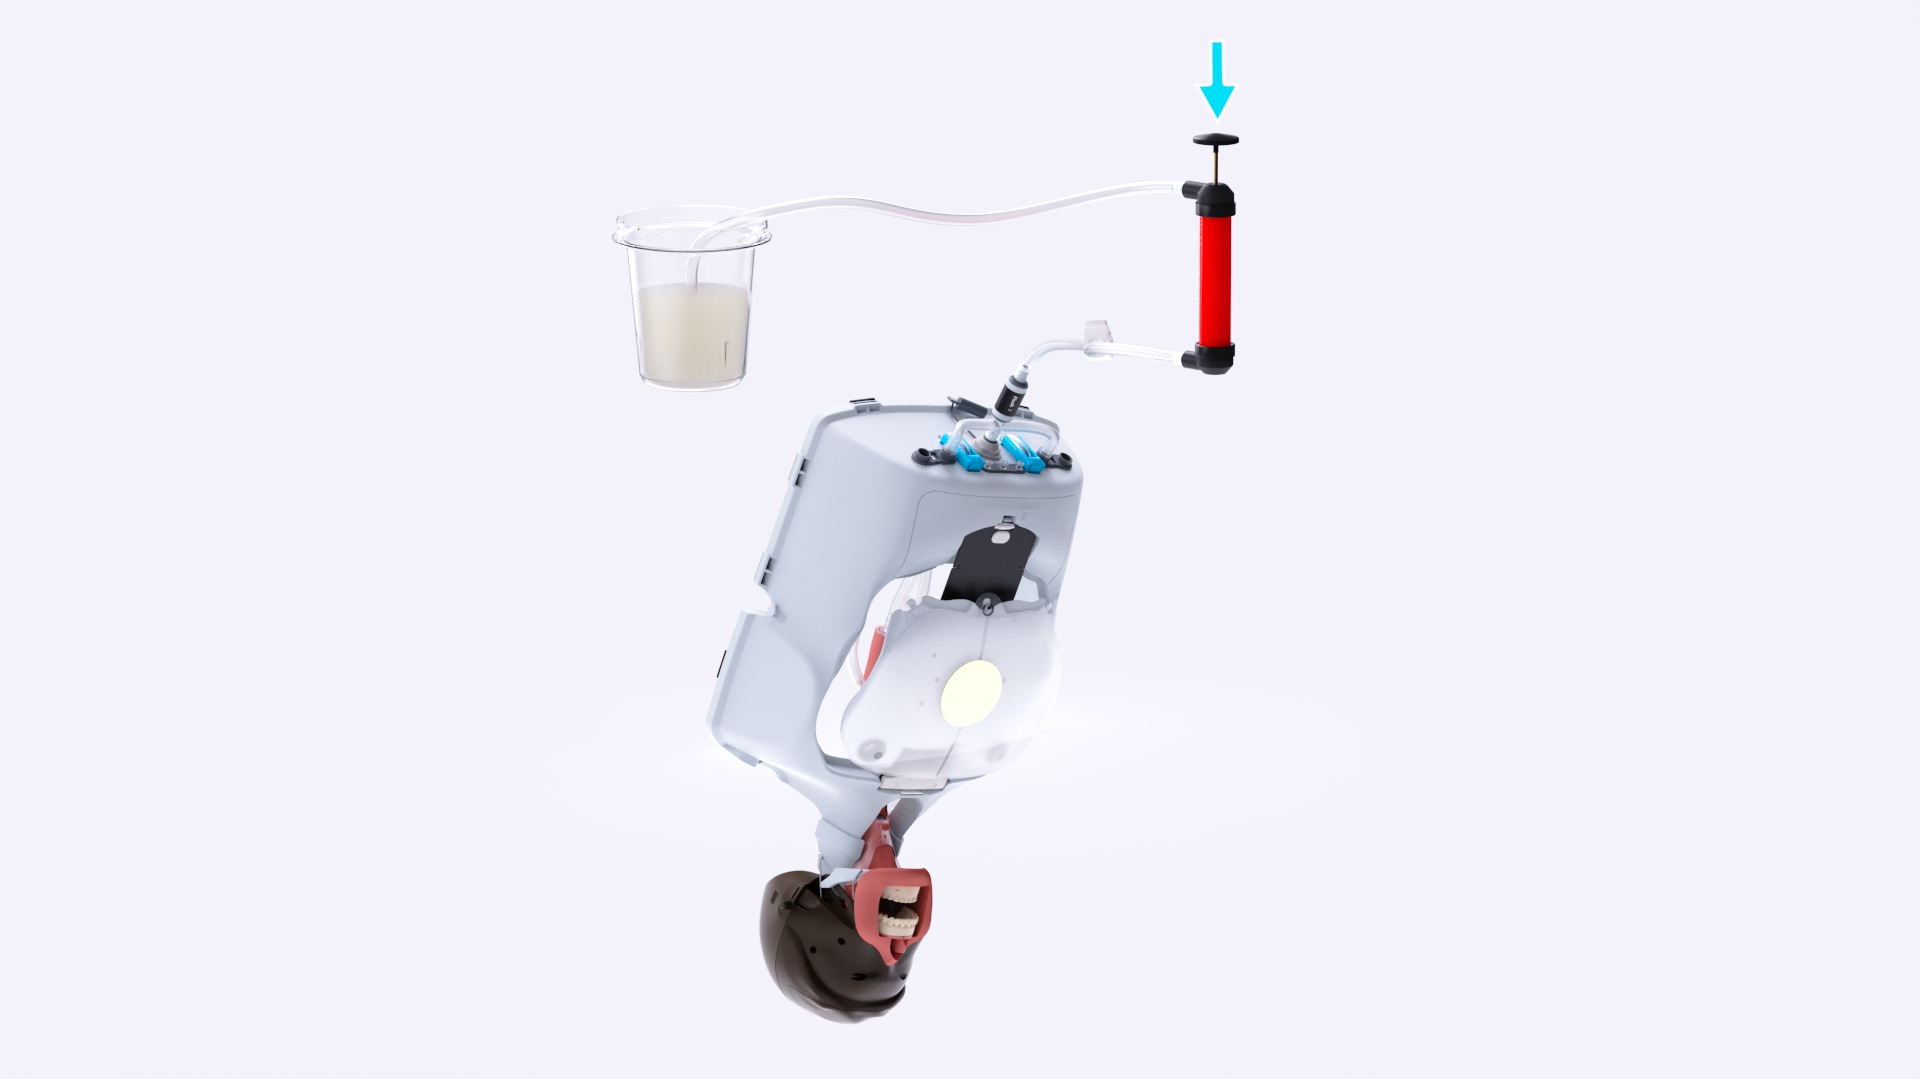
Pump soapy water from the LSU for LAAS canister through the manikin until visibly clean. Repeat using clean water to remove any soapy residue.
Use a damp cloth and lukewarm mild soapy water to clean all external surfaces, parts, and accessories.
Repeat with a damp clean cloth to remove traces of soap.
Rinse the face skin, chest skin and aspiration containers with water.
Let everything dry completely before storing or sanitizing.
Sanitizing
The whole system needs to be sanitized after use to prevent mold growth.
CAUTION
Do not use bleach to clean the external surfaces.
Fill the LSU for LAAS canister with a solution of 0.5% bleach.
Use the hand pump to push the solution through the cleaning adapter and manikin until the airway is flushed. Leave for two minutes.
Repeat step 1 and 2 using water.
Sanitize all external surfaces, parts, and accessories using a cloth with 70% Ethanol or 60% Isopropanol.
Let the system dry completely before storing.